n8n
Connect n8n to AI Studio through its OpenAI-compatible AI Agent node.
This quickstart guide shows you how to connect n8n with Hyperstack AI Studio using n8n’s built-in OpenAI-compatible AI Agent node. You’ll learn how to run n8n, generate AI Studio credentials, configure an AI Agent node with a Hyperstack model, and test an automated workflow. This setup allows you to run chat, summarization and classification tasks in n8n using any model in the AI Studio catalog, without writing custom code.
For the complete tutorial with background concepts, screenshots, and extended workflow examples, see How to Connect Hyperstack AI Studio with n8n for Seamless Workflow Automation.
Why Integrate n8n with Hyperstack AI Studio
n8n is a visual, node-based automation platform that allows you to build workflows across APIs, databases, and services with minimal code. It includes an AI Agent node designed to work with OpenAI-compatible APIs.
Hyperstack AI Studio provides OpenAI-compatible LLM endpoints backed by scalable GPU infrastructure. Because the API format is compatible, Hyperstack can be used as a drop-in backend for n8n’s AI Agent node, enabling AI-powered automation without custom adapters or plugins.
By combining n8n with Hyperstack AI Studio, you can orchestrate workflows that trigger LLM inference, process responses, and route results to downstream systems such as databases, webhooks, or internal tools.
For a deeper walkthrough of supported workflow patterns, node configuration options, and production considerations, see the full guide.
How to Install and Connect n8n to Hyperstack AI Studio
Follow these steps to run n8n locally, configure Hyperstack credentials, and test an AI-powered workflow.
-
Run n8n Locally with Docker
n8n recommends Docker for a consistent and secure deployment. For additional deployment options and Docker Compose examples, see details about alternative deployments here.
-
Create a persistent Docker volume for n8n data:
terminaldocker volume create n8n_data -
Start the n8n container:
terminaldocker run -it --rm \
--name n8n \
-p 5678:5678 \
-e GENERIC_TIMEZONE="<YOUR_TIMEZONE>" \
-e TZ="<YOUR_TIMEZONE>" \
-e N8N_ENFORCE_SETTINGS_FILE_PERMISSIONS=true \
-e N8N_RUNNERS_ENABLED=true \
-v n8n_data:/home/node/.n8n \
docker.n8n.io/n8nio/n8n -
Open http://localhost:5678 and complete the initial n8n user setup.
-
-
Get API Credentials from Hyperstack AI Studio
Generate the credentials required to authenticate n8n with AI Studio. For screenshots and detailed model selection guidance, see details about model selection here.
- Log in to the Hyperstack Console
- Open the AI Studio Playground and select a model (for example,
openai/gpt-oss-20b) - Open the API tab to copy the Base URL and Model ID
- Go to the API Keys page and generate a new key
- Copy and securely store the API key
-
Create a New Workflow in n8n
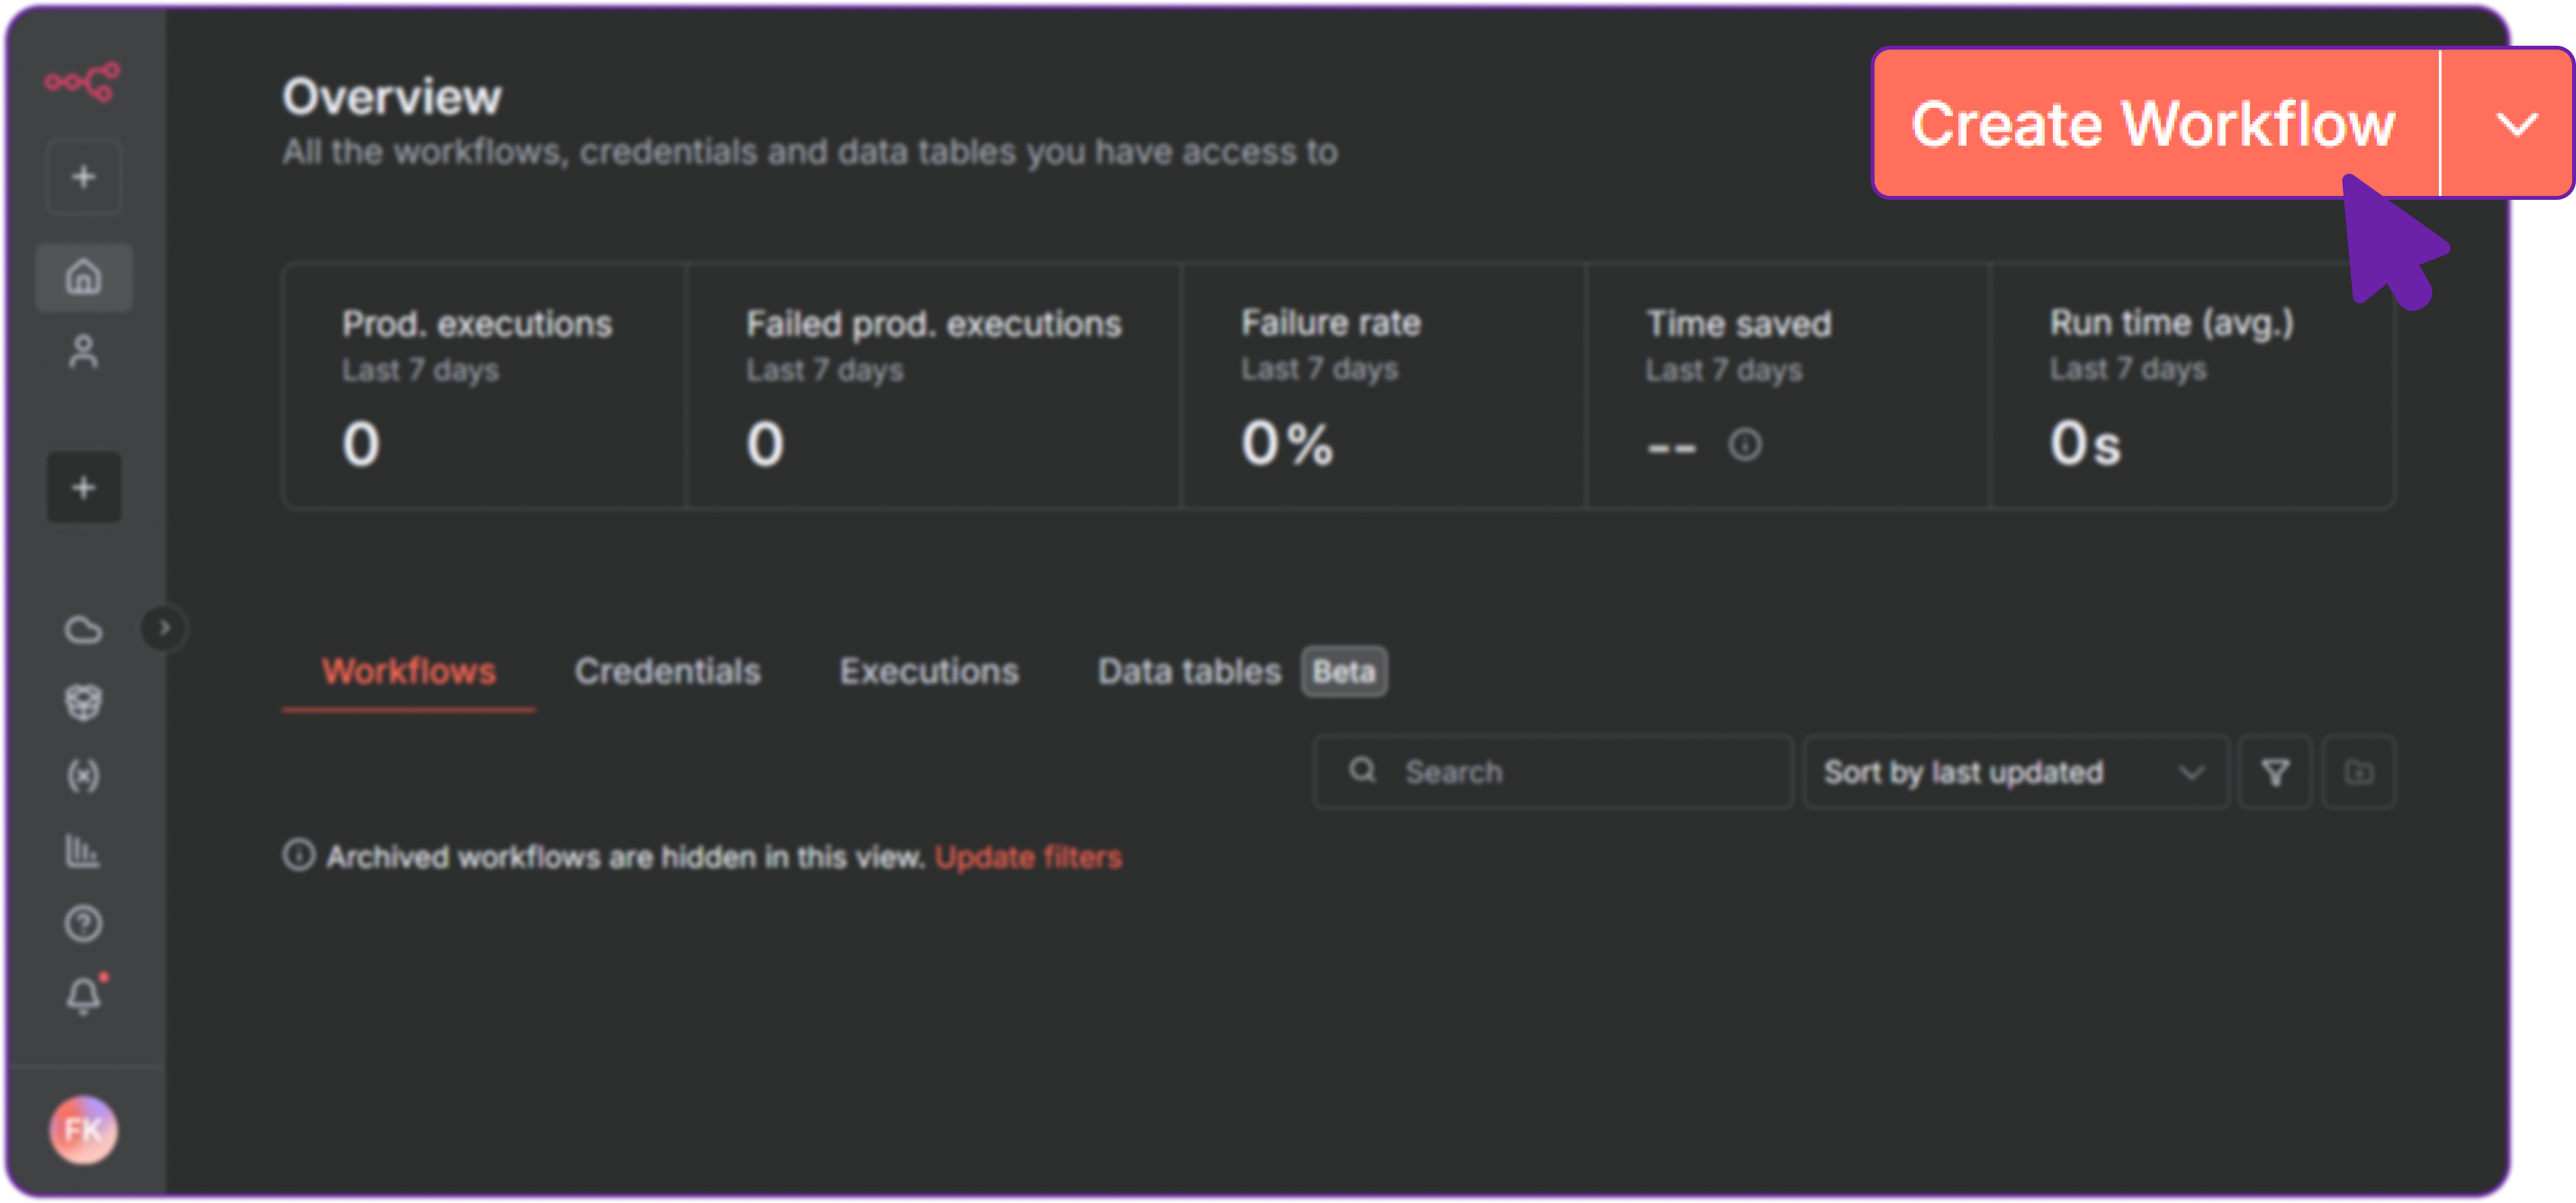
From the n8n dashboard, click New Workflow to create a blank automation.
-
Add a Chat Trigger Node
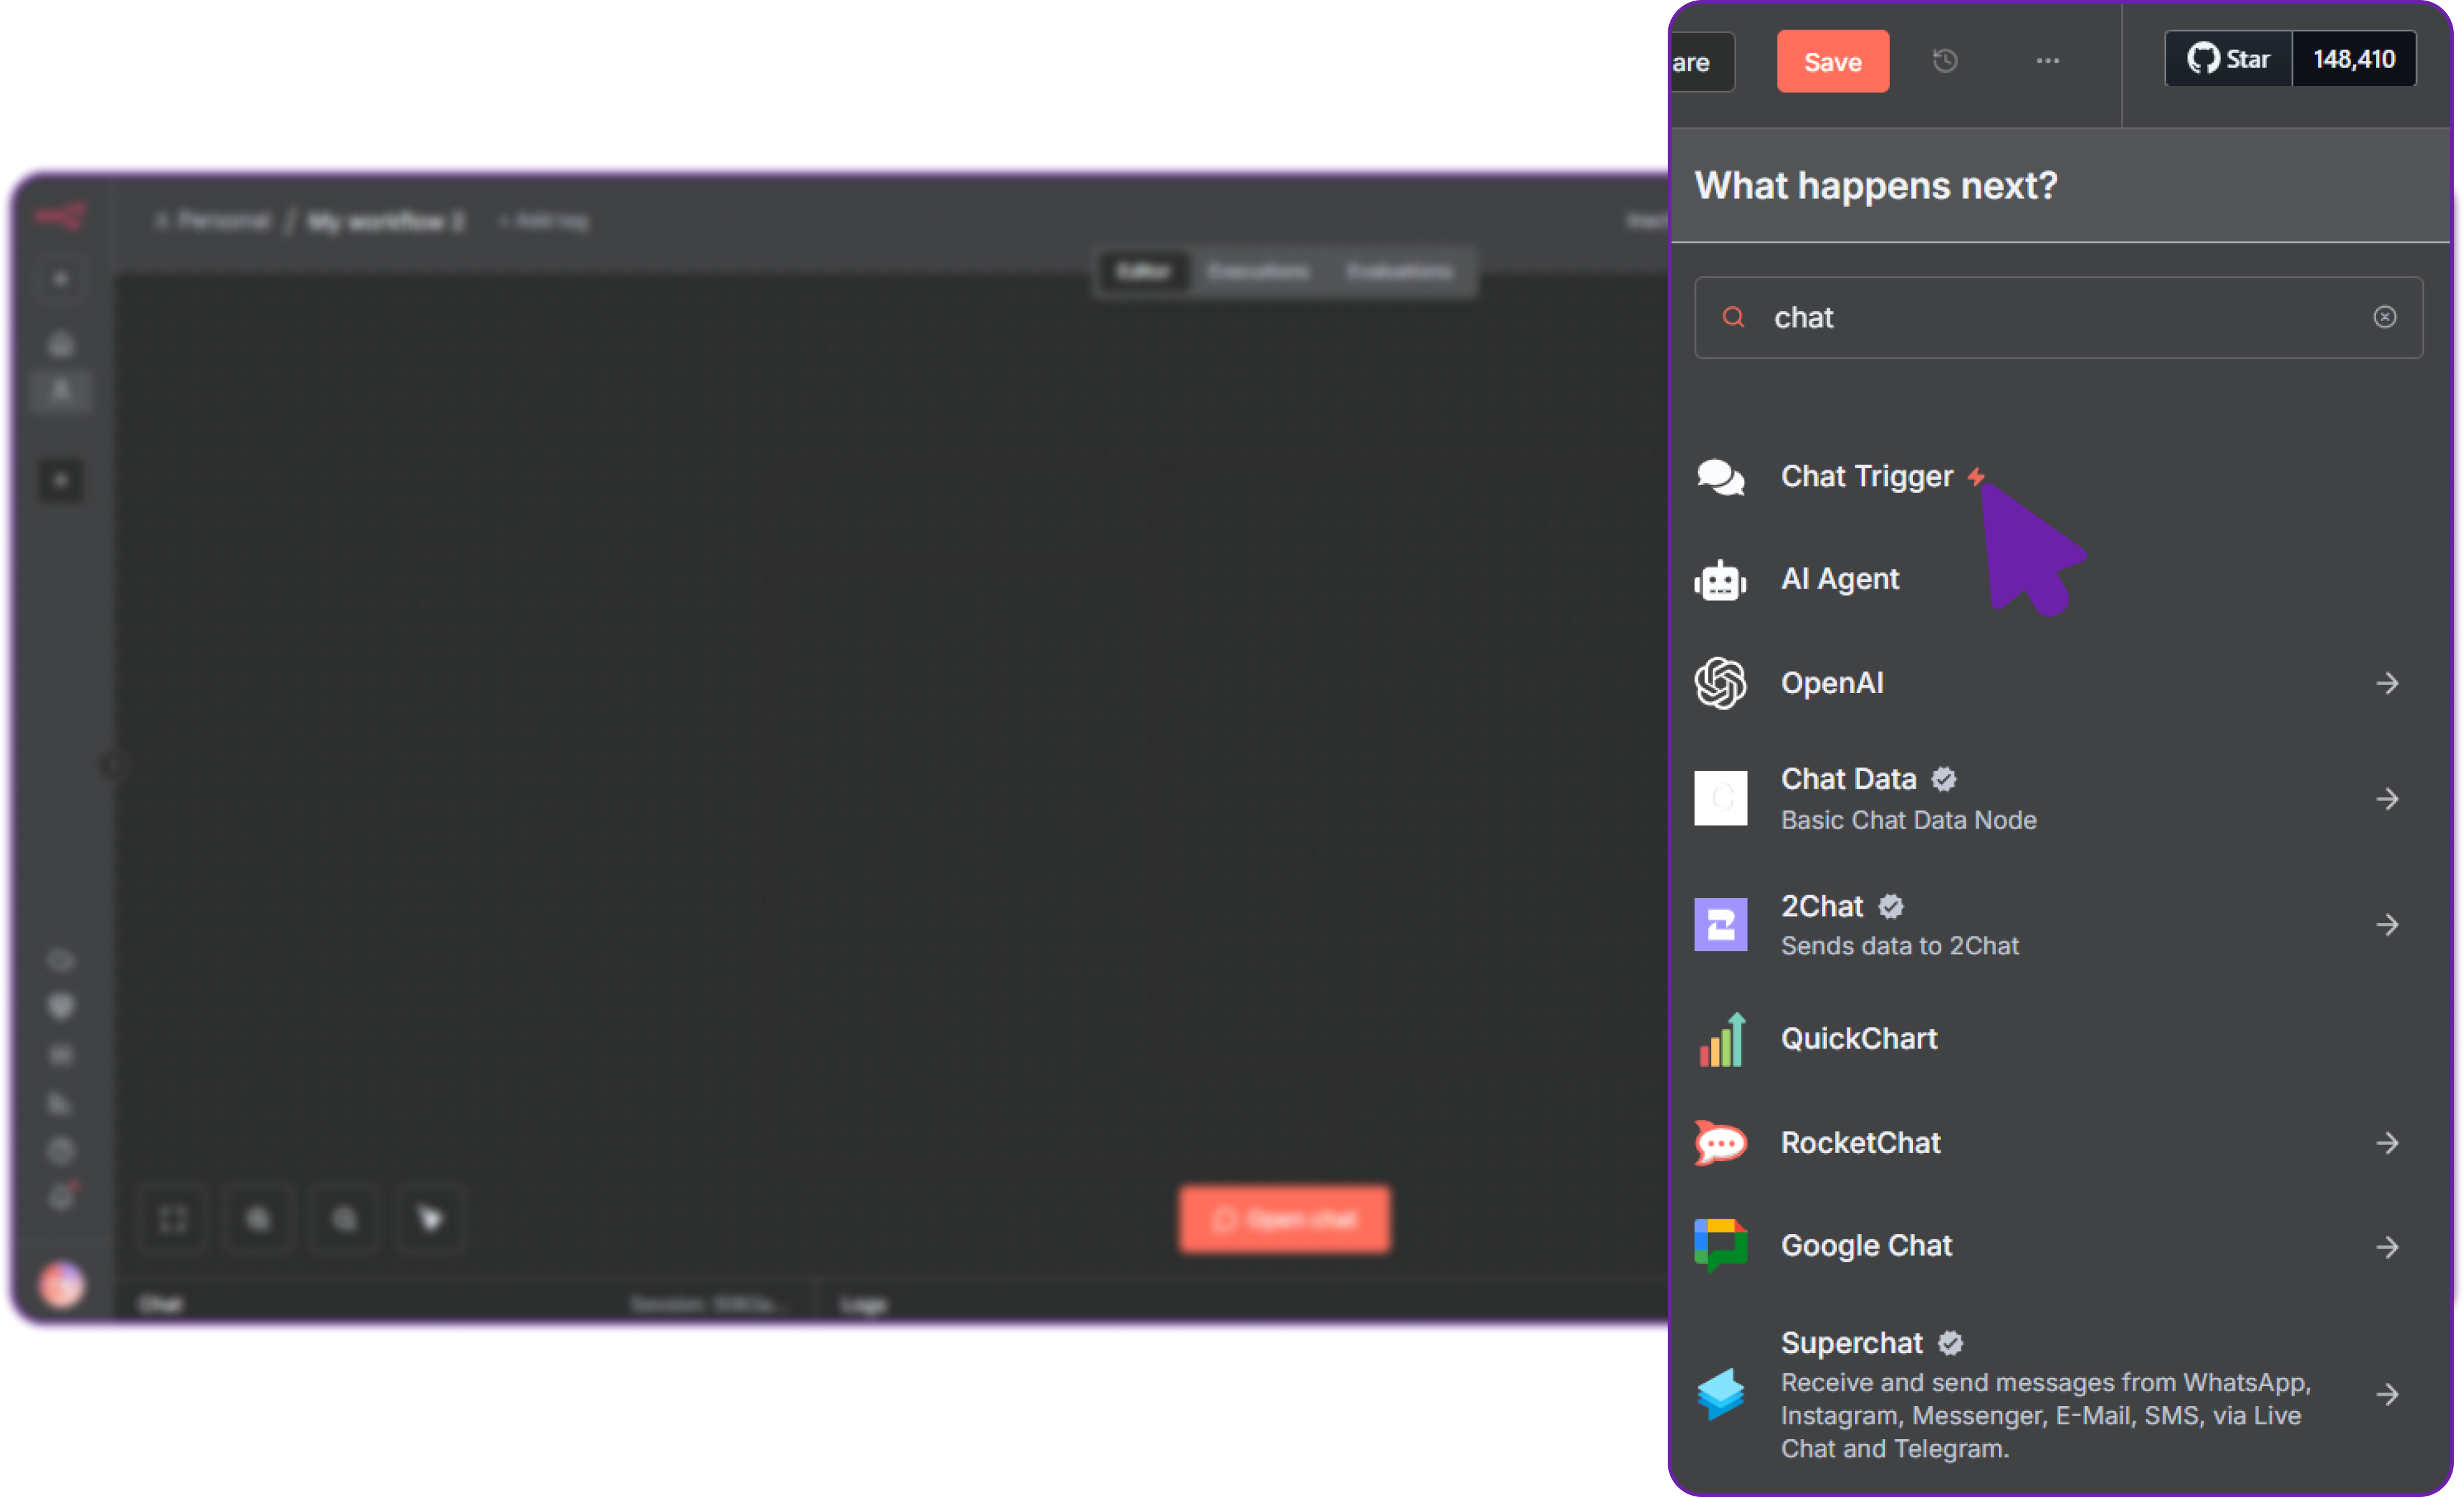
Use a Chat Trigger node to start the workflow.
-
Click the + icon and add Chat Trigger
-
Leave the default configuration and return to the canvas
-
-
Add an AI Agent Node
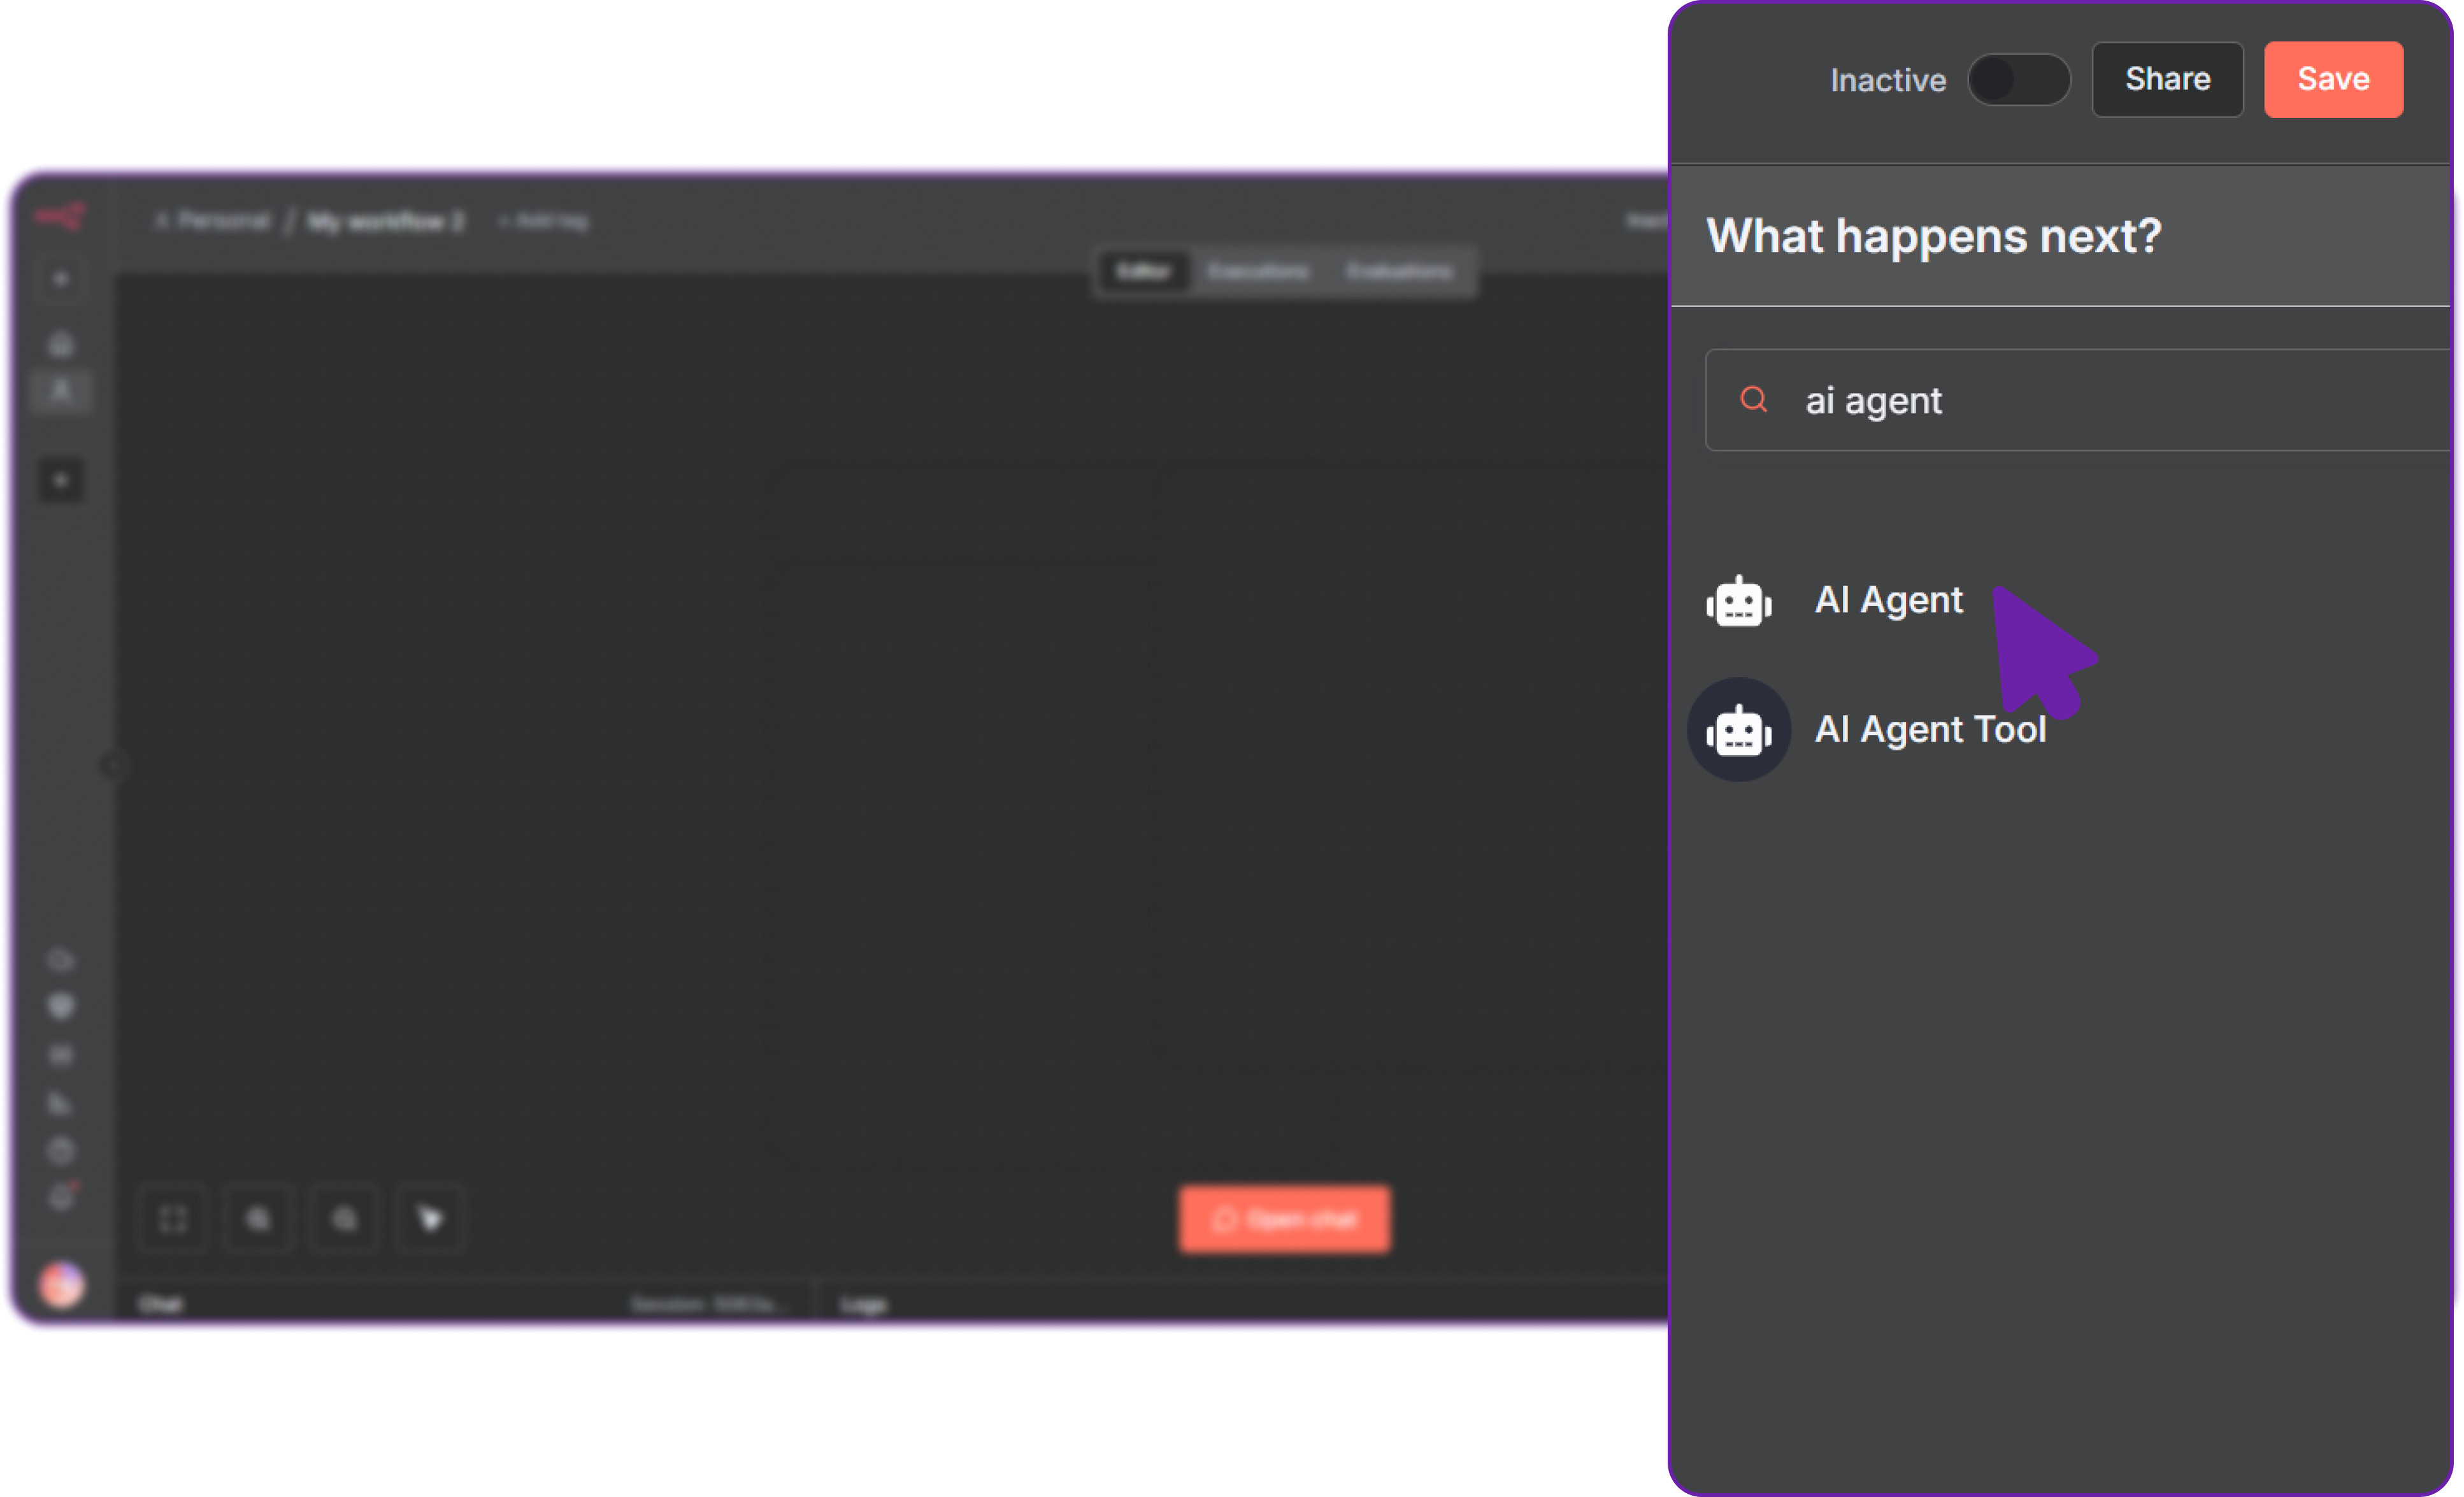
The AI Agent node sends messages to your AI Studio model. For advanced agent configuration, prompt handling, and error troubleshooting, see details about AI Agent configuration here.
-
Click the + icon and add AI Agent
-
Under Credentials, create a new OpenAI-compatible credential
-
-
Configure Hyperstack Credentials
When creating the credential, use the following values:
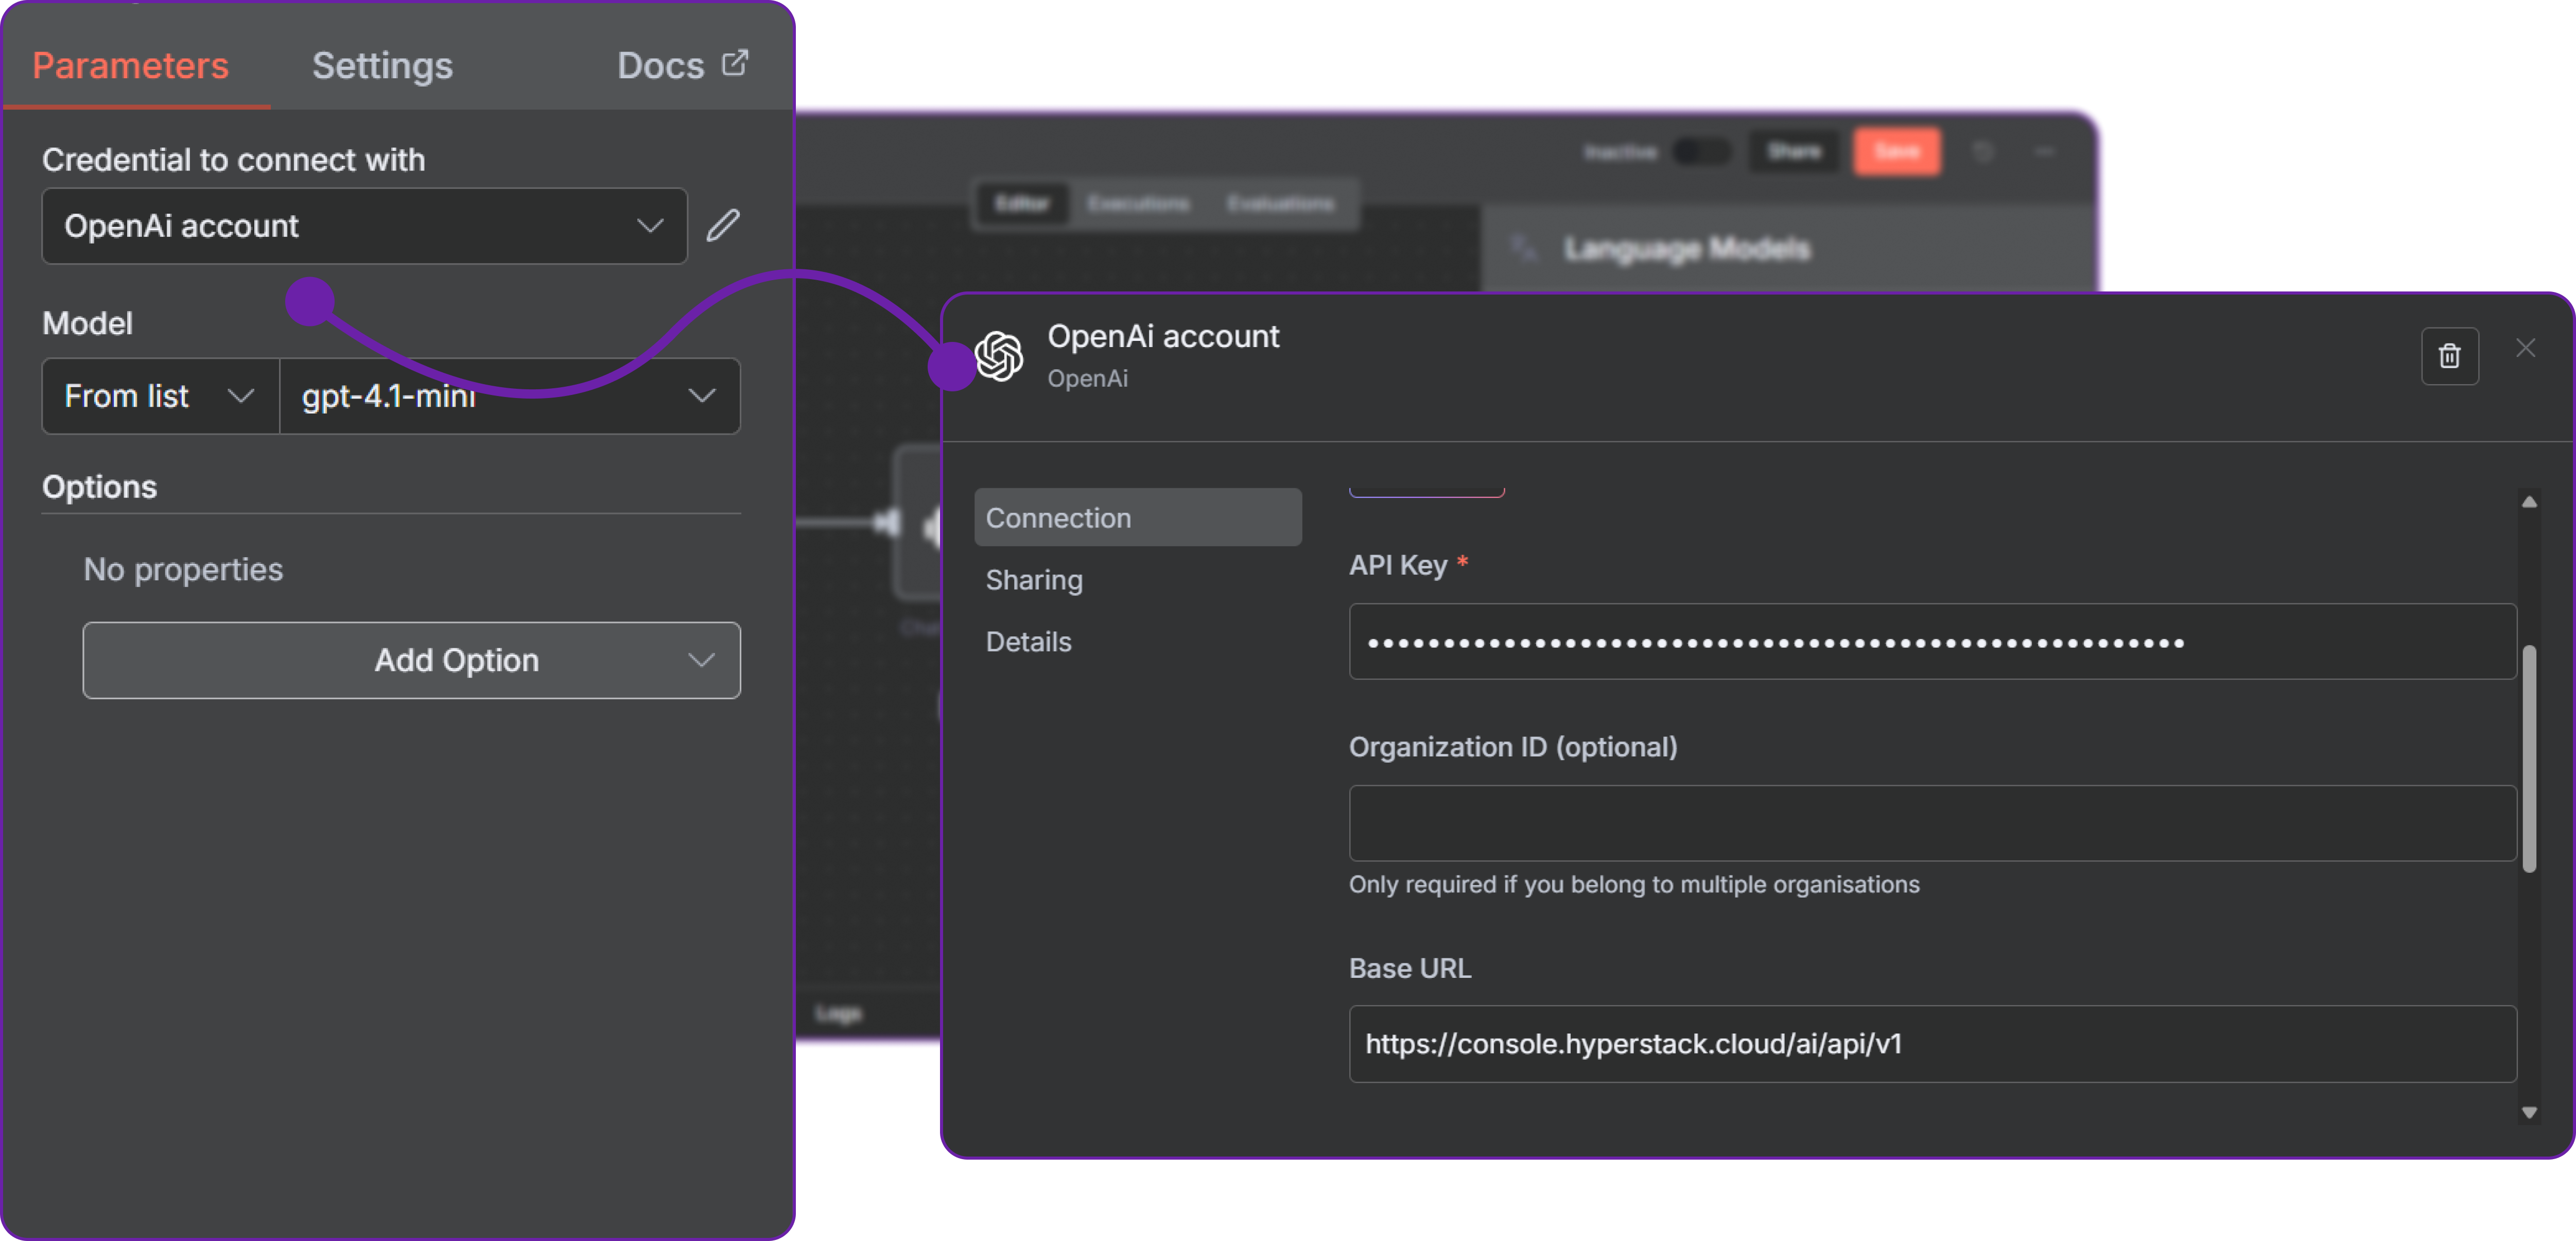
- API Key: Your Hyperstack API key
- Base URL: Hyperstack AI Studio base URL
https://console.hyperstack.cloud/ai/api/v1
Save the credential.
-
Select a Hyperstack Model
In the AI Agent node configuration, set the Model field to your AI Studio model ID (for example,
openai/gpt-oss-20b). -
Run and Test the Workflow
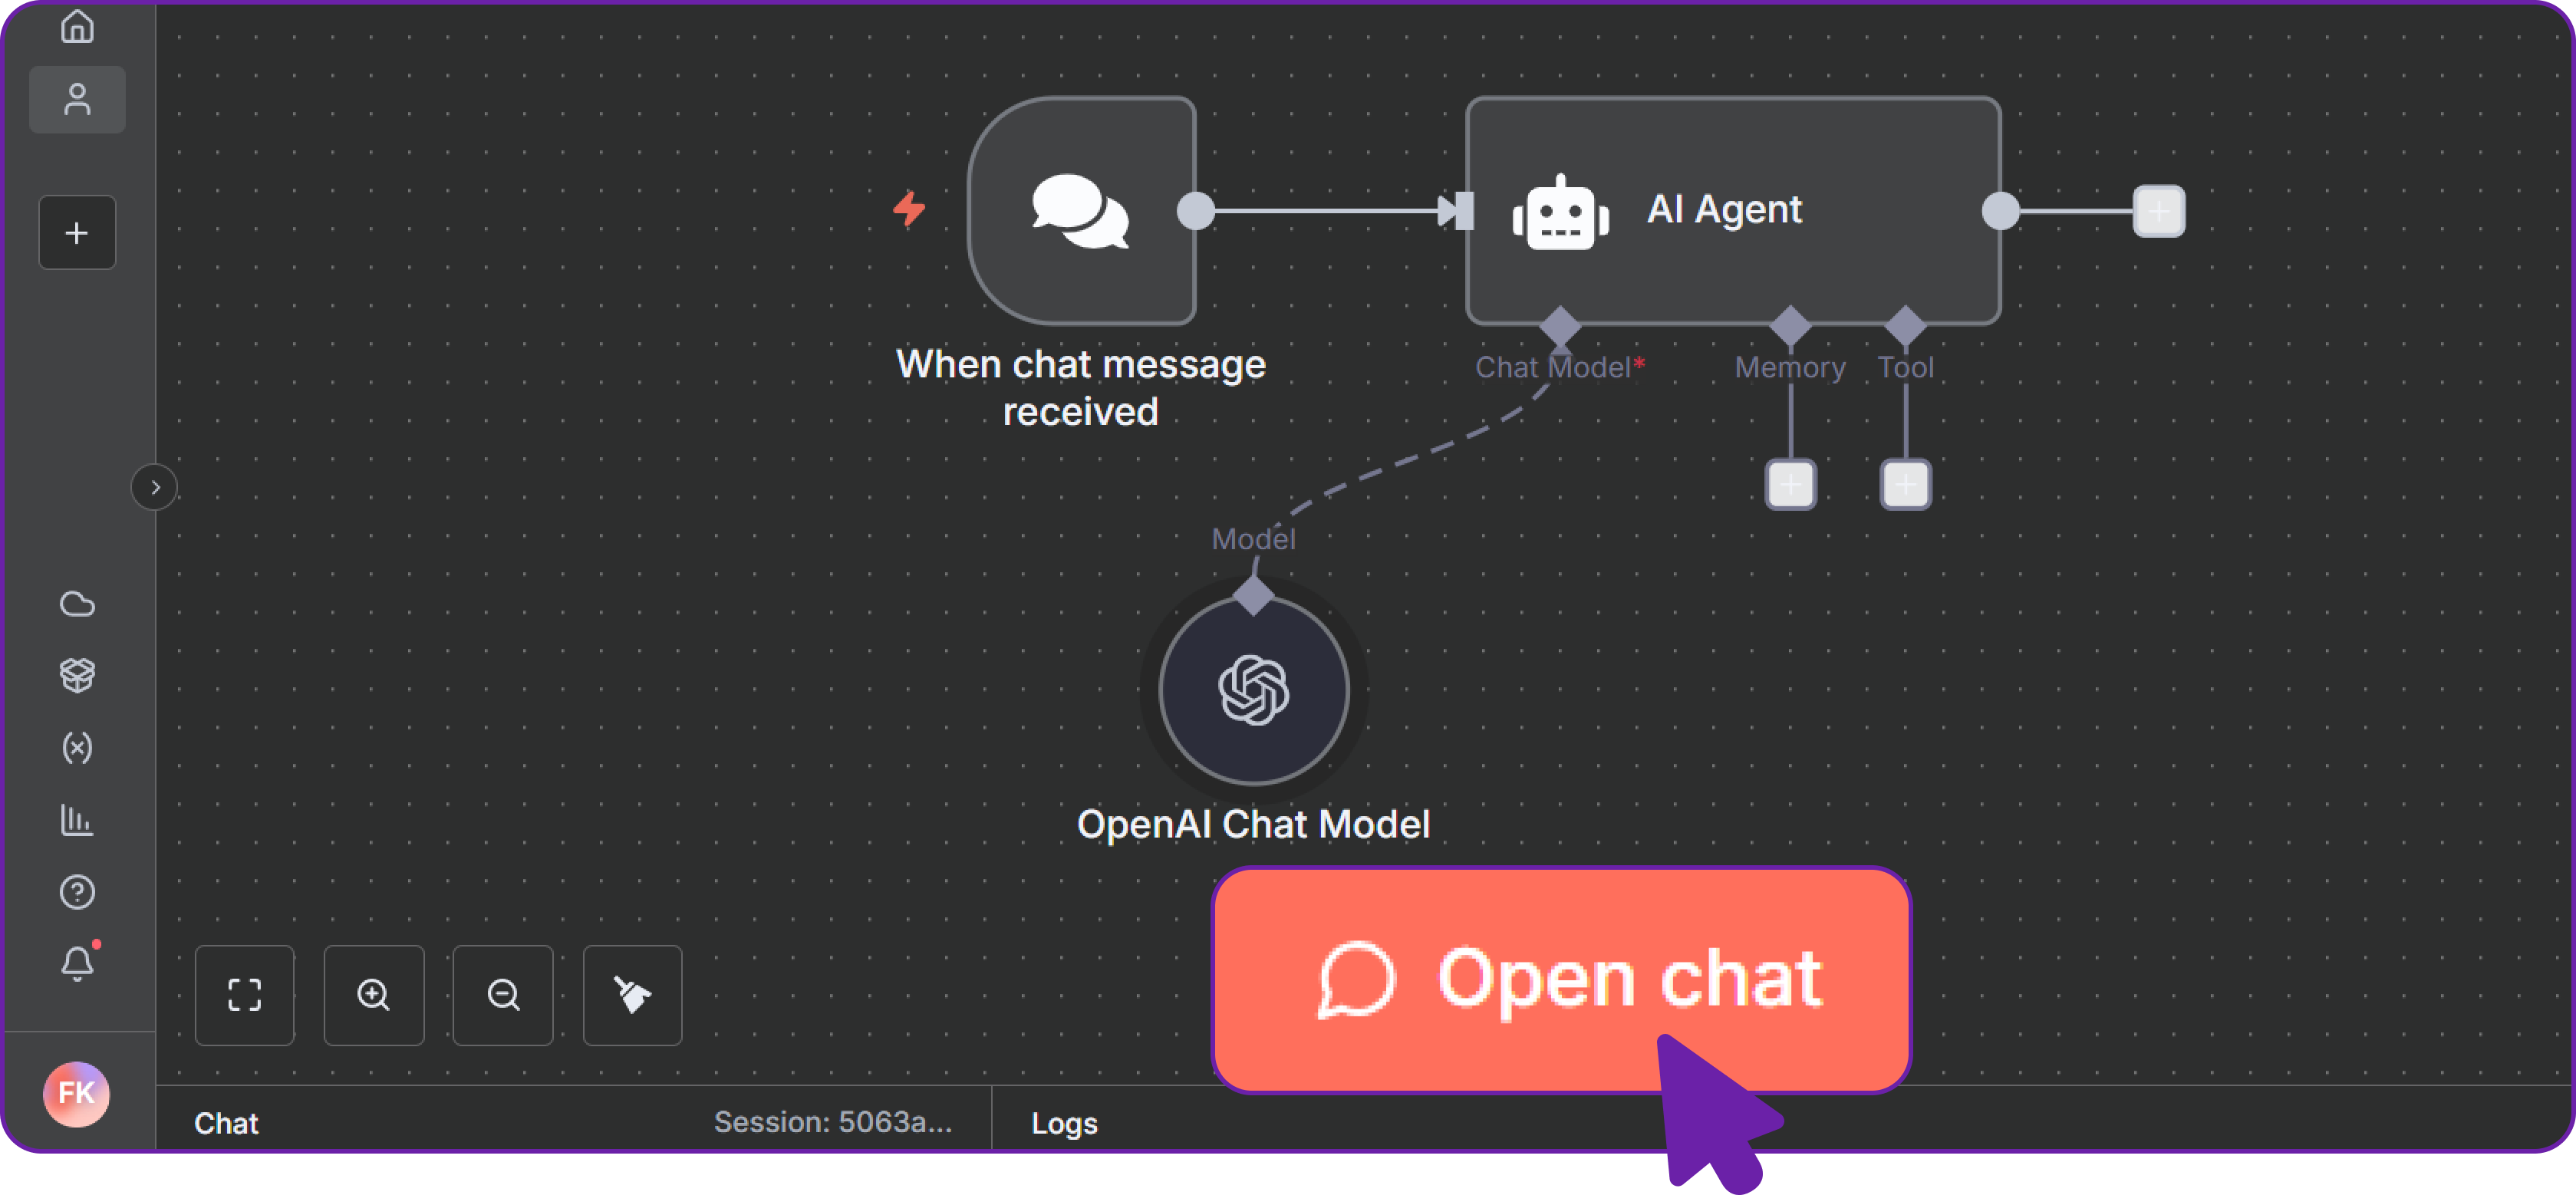
Test the integration by starting a chat session. For expanded testing examples and downstream workflow extensions, see details about workflow testing here.
-
Click Open Chat in the workflow
-
Send a prompt such as
Summarize this message -
Confirm the response is returned from the AI Studio model
If the workflow executes successfully, the integration is complete.
-
-
Optional: Add Memory to the AI Agent
To preserve conversation context, attach a memory node to the AI Agent and configure the context window size.
For advanced memory backends and persistence options, see the full guide.