Change VM Flavor
Switch an existing virtual machine to a new hardware flavor by recreating it.
This tutorial provides an overview of how flavor changes work in Hyperstack and walks you through the process of switching an existing virtual machine (VM) to a new hardware configuration. It explains why changing a flavor requires recreating the virtual machine, outlines the high-level workflow involved, and shows how to safely complete the process using snapshots before moving on to the step-by-step guide below.
Overview
A flavor defines the hardware configuration of a virtual machine, including CPU, memory, GPU, and disk characteristics. Changing the flavor of a VM is typically required when your workload’s resource requirements change or when you need to move to a different hardware profile.
Common reasons to change a VM flavor include:
- Scaling CPU, memory, or GPU resources up or down
- Switching to a different GPU model
- Optimizing performance or cost
- Standardizing workloads on a different flavor type
Hyperstack does not support changing a flavor on an existing VM in place. Instead, flavor changes are performed using a snapshot-and-redeploy workflow. At a high level, this process involves:
- Creating a snapshot of the existing VM.
- Converting that snapshot into a reusable custom image.
- Deploying a VM with the new flavor and custom image.
In this workflow, the snapshot preserves the VM’s disk state, including the operating system, installed software, and configuration. Creating a custom image from the snapshot allows that disk state to be reused when deploying a new VM, ensuring the workload starts with the same data and environment while applying the updated hardware configuration.
For detailed instructions on each of these steps, see the step-by-step guide below.
Step-by-Step Guide: Change a Virtual Machine Flavor
Follow the steps below to change the flavor of your virtual machine by recreating it from a snapshot.
Prerequisites
Before you begin, ensure that all of the following requirements are met:
- Supported flavor: The source VM must not use a Spot flavor, because Spot flavors do not support snapshots.
- Snapshot requirements: Snapshots are limited to a maximum size of 100 GB, and only one snapshot at a time can be created for a given VM.
- Kubernetes clusters: Snapshots are not supported for VMs that are part of Kubernetes clusters.
- Bootable volumes: Snapshots are not supported for VMs deployed from bootable volumes. If snapshot support is required, deploy VMs directly from an image instead.
- Region consistency: The source VM, snapshot, custom image, and the VM with the new flavor must all be in the same region.
- Workload data backup: If your workload stores data on ephemeral storage and you need to preserve that data when moving to the VM with the new flavor, back up any workload data you wish to retain using persistent volumes before deleting the original VM. For more information, see avoiding data loss from ephemeral storage.
- Attached volumes: Any attached volumes must be detached before creating the snapshot. These volumes can be re-attached to the VM with the new flavor after it is created.
-
Create a Snapshot of the Source VM
Capture the current disk state of the VM so it can be reused with a different flavor.
Planned downtime during snapshottingDuring snapshot creation, the VM is automatically shut down and restarted afterward. Ensure that your workload can tolerate this downtime.
-
Log in to the Hyperstack Console and navigate to the Virtual Machines page.
-
Locate the VM that you want to change to a different flavor.
-
Hover over the ⋮ menu in the top-right corner to reveal the Actions menu, then select Snapshot and confirm.
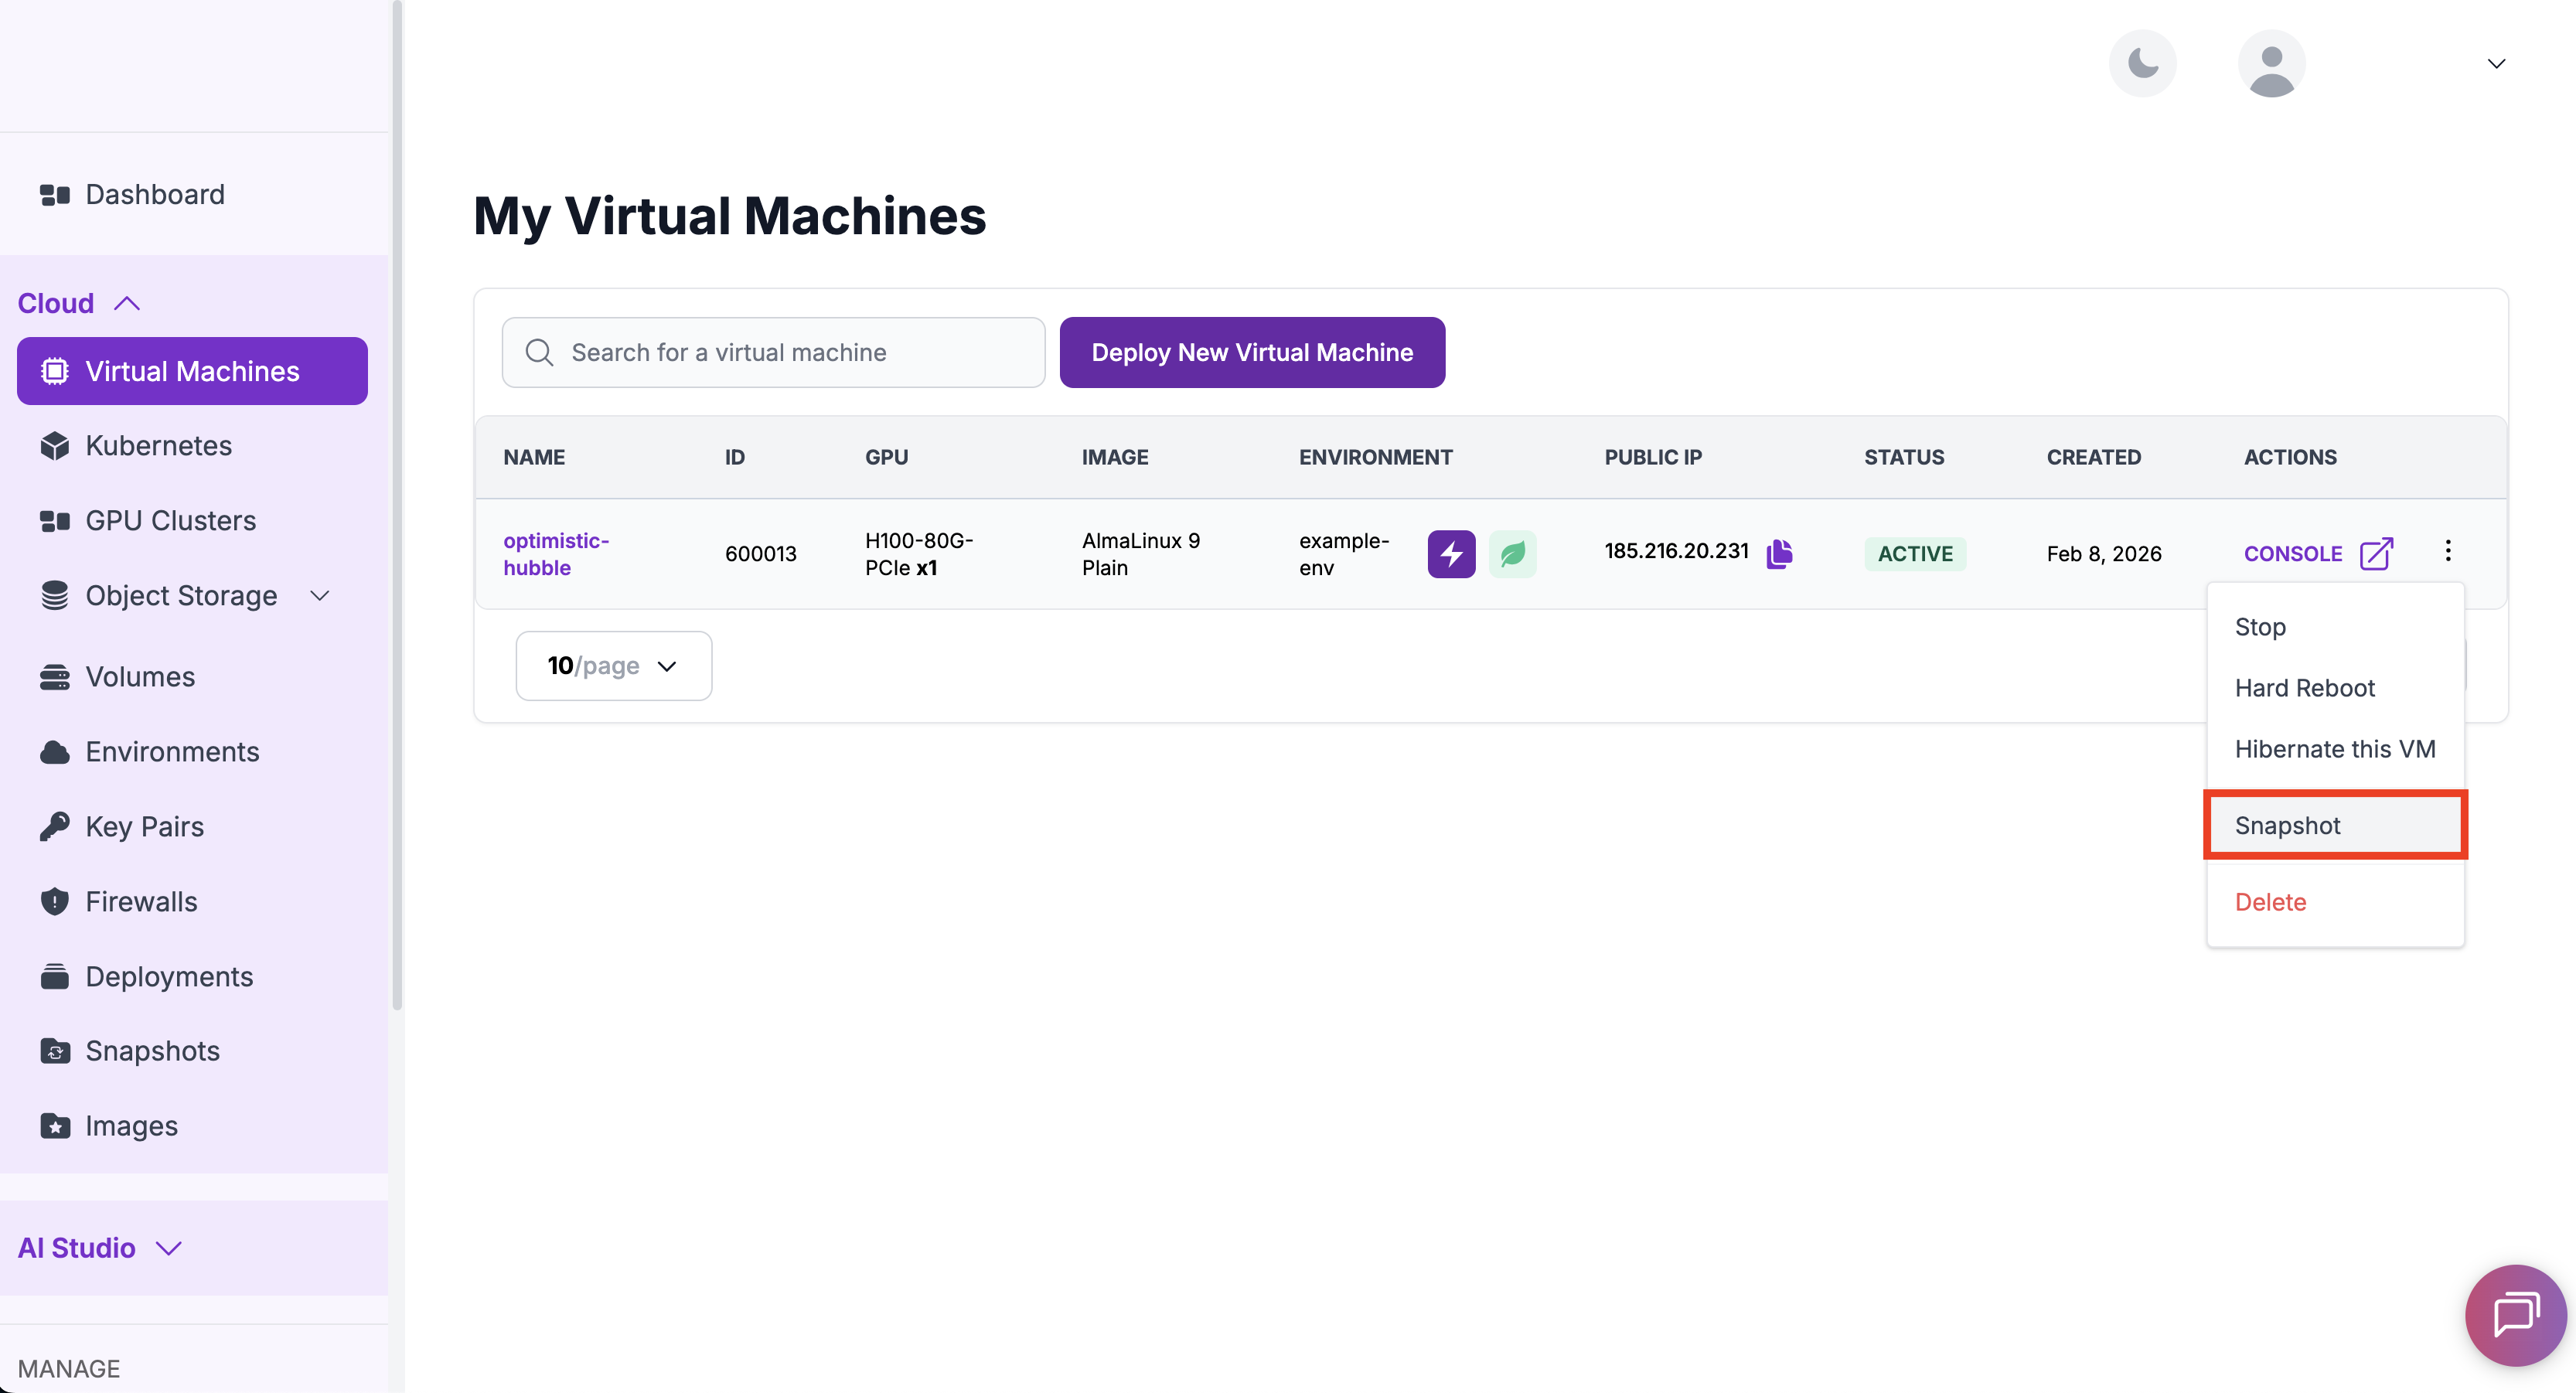
-
Provide a name and description, then click Create Snapshot.
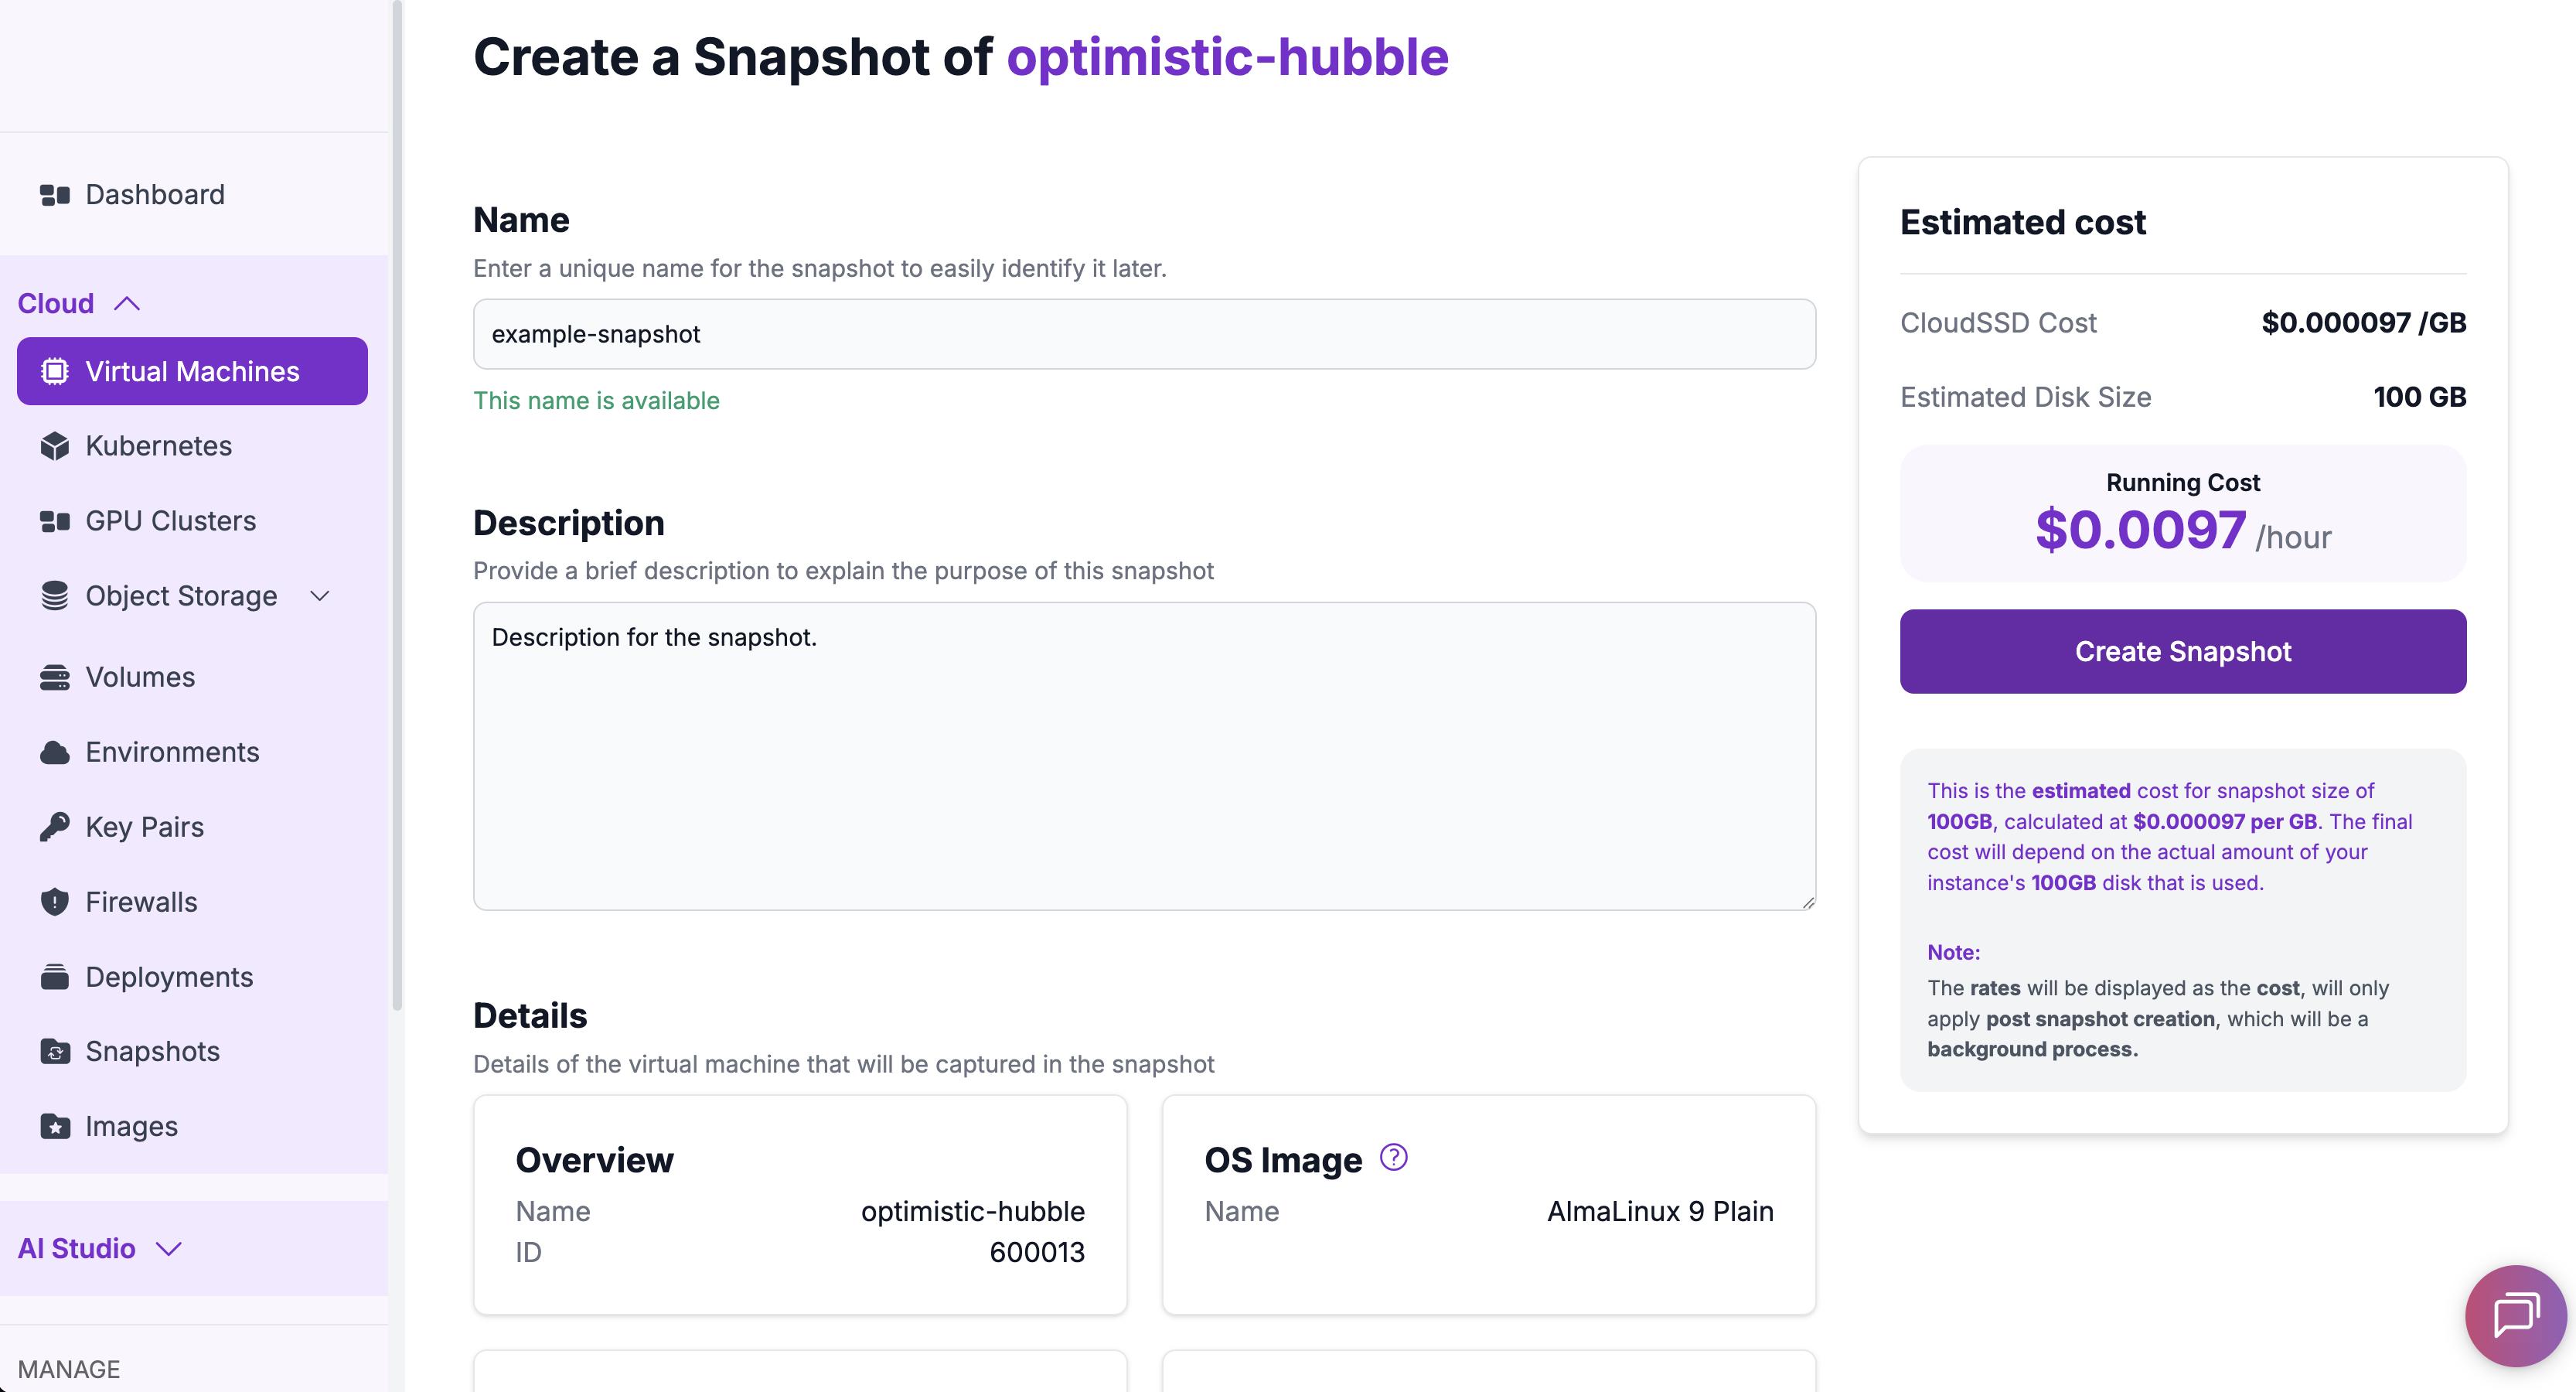
The VM will shut down temporarily while the snapshot is created.
-
-
Create an Image from the Snapshot
Convert the snapshot into a reusable image that can be used to deploy a new VM.
-
Navigate to the Snapshots page in the Hyperstack Console.
-
Locate the snapshot you created, hover over the ⋮ menu, and select Create Image.
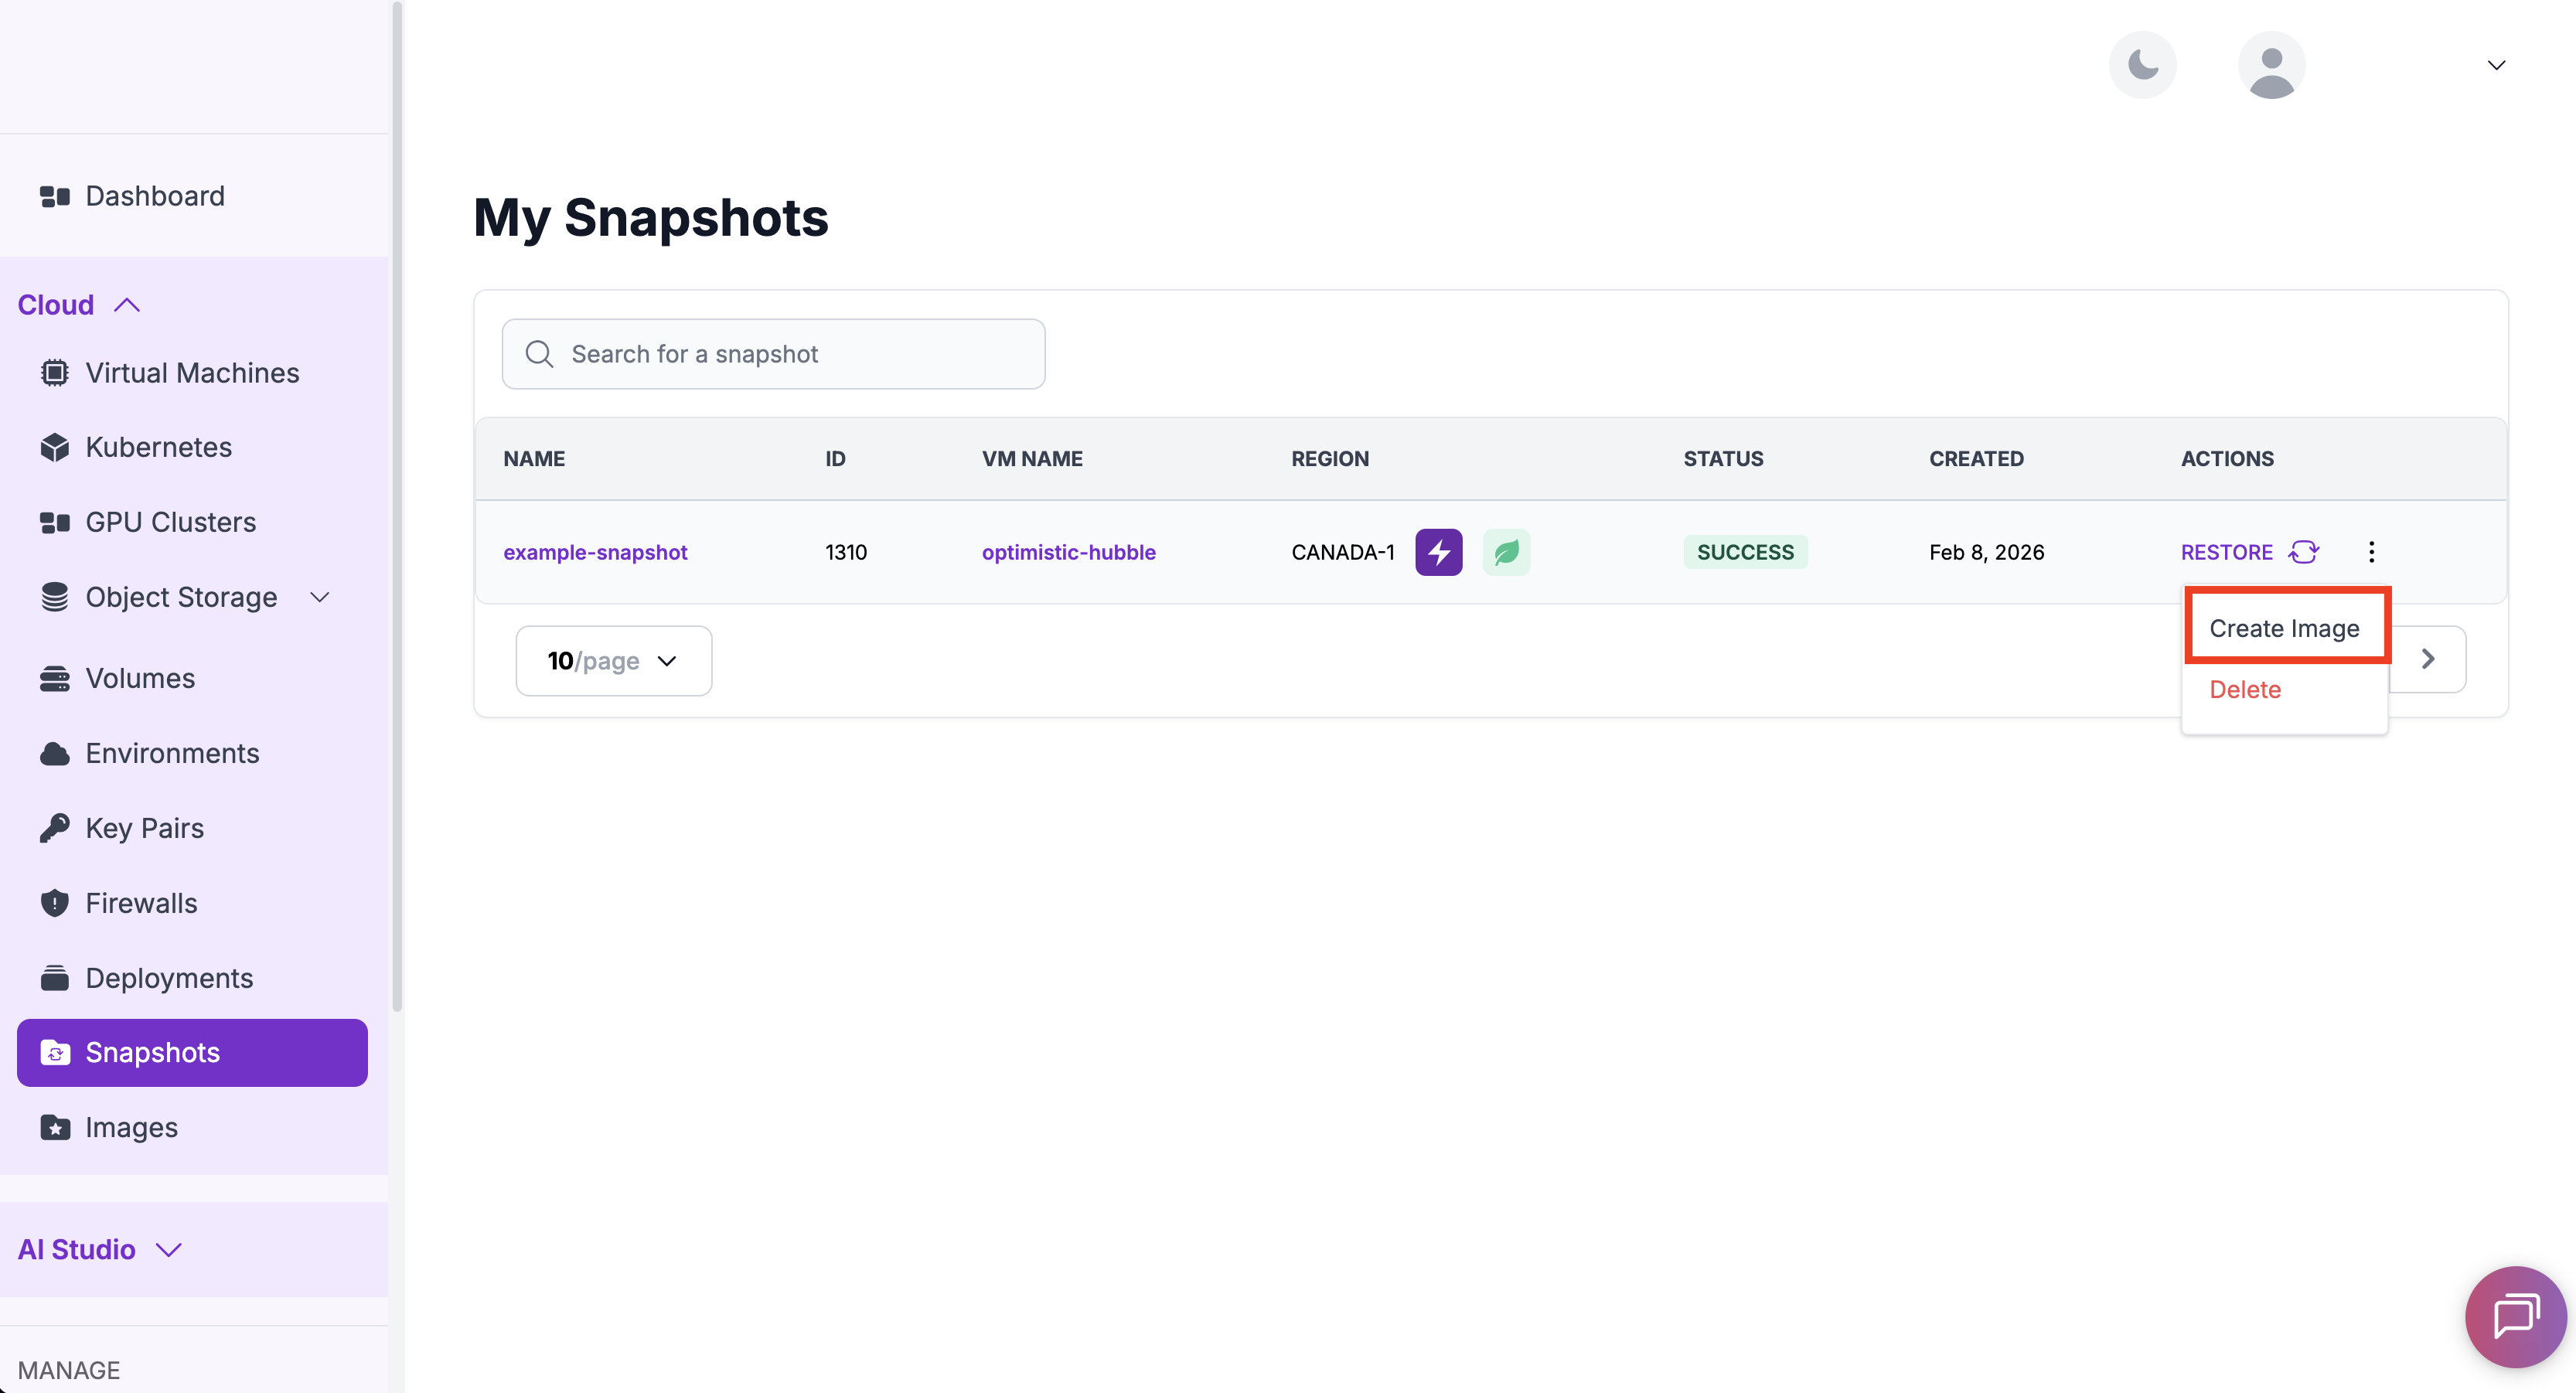
-
Enter a name for the image and confirm.
-
Navigate to the Images page and wait until the image reaches the
SUCCESSstatus. Once complete, the image is ready to be used when deploying a new VM.
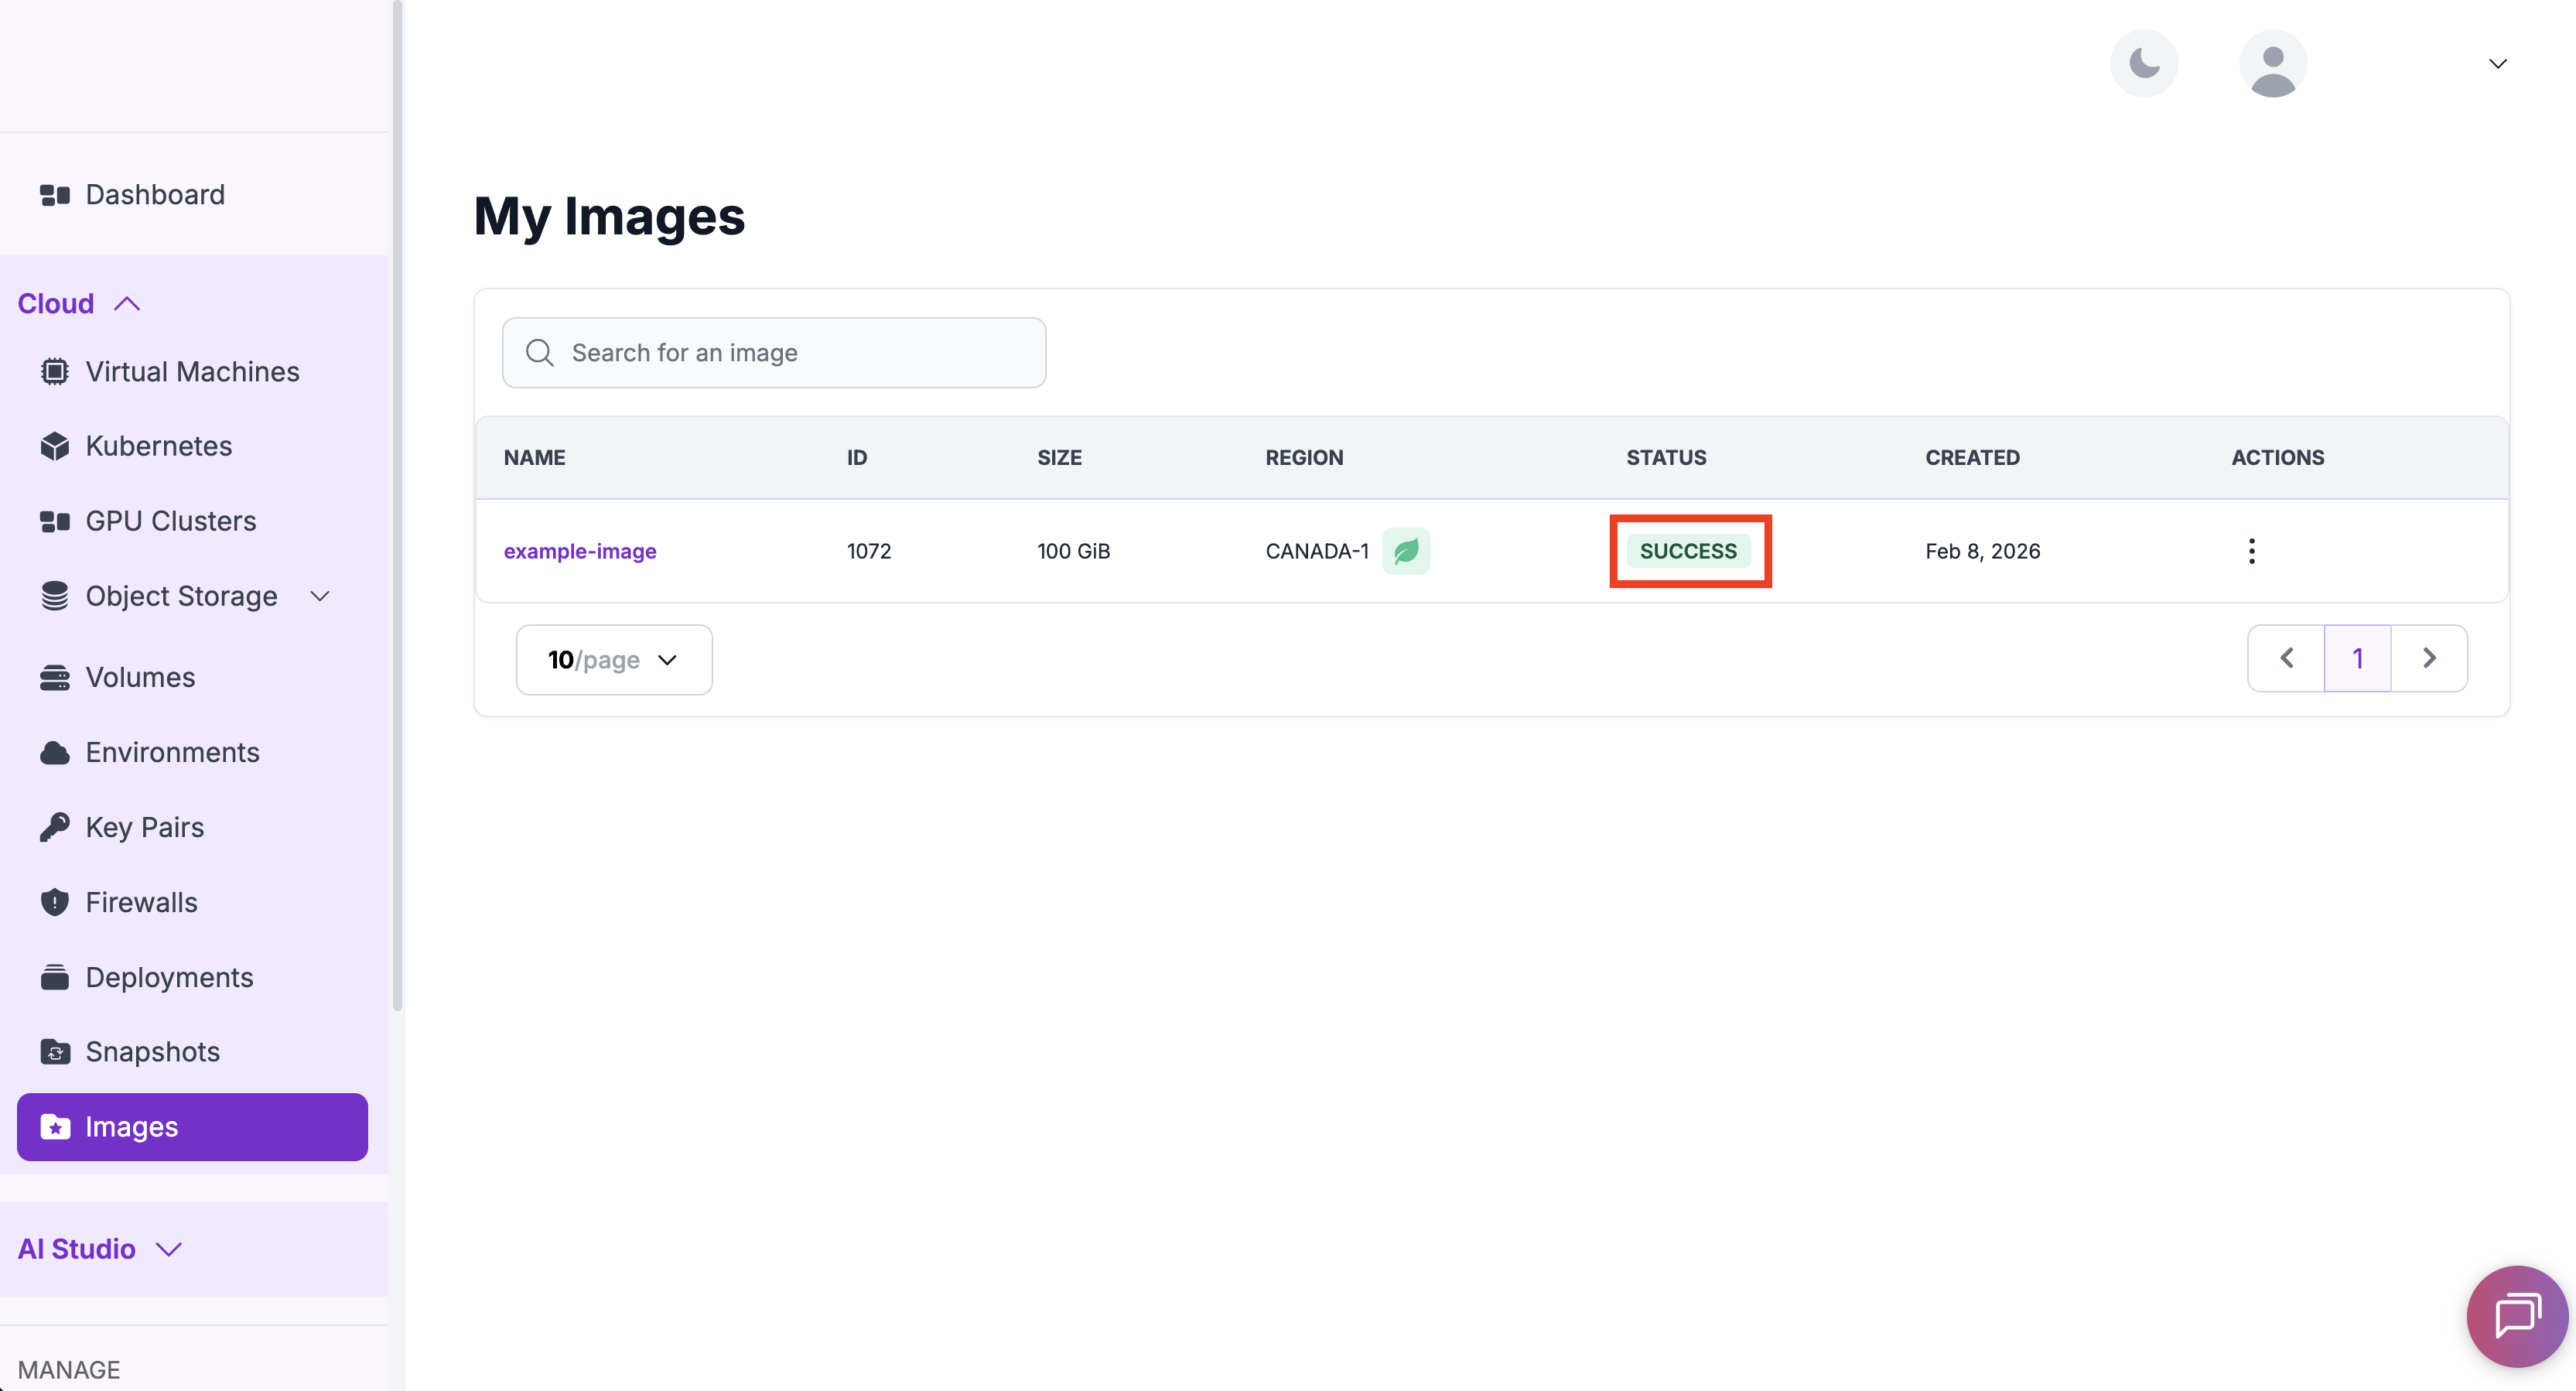
This image will serve as the boot source for the VM with the new flavor.
-
-
Deploy a New VM Using the Target Flavor and Custom Image
Launch a new virtual machine using the custom image derived from the original VM and the selected target flavor.
-
Navigate to the Virtual Machines page and click Deploy Virtual Machine.
-
Select the new flavor you want to use.
-
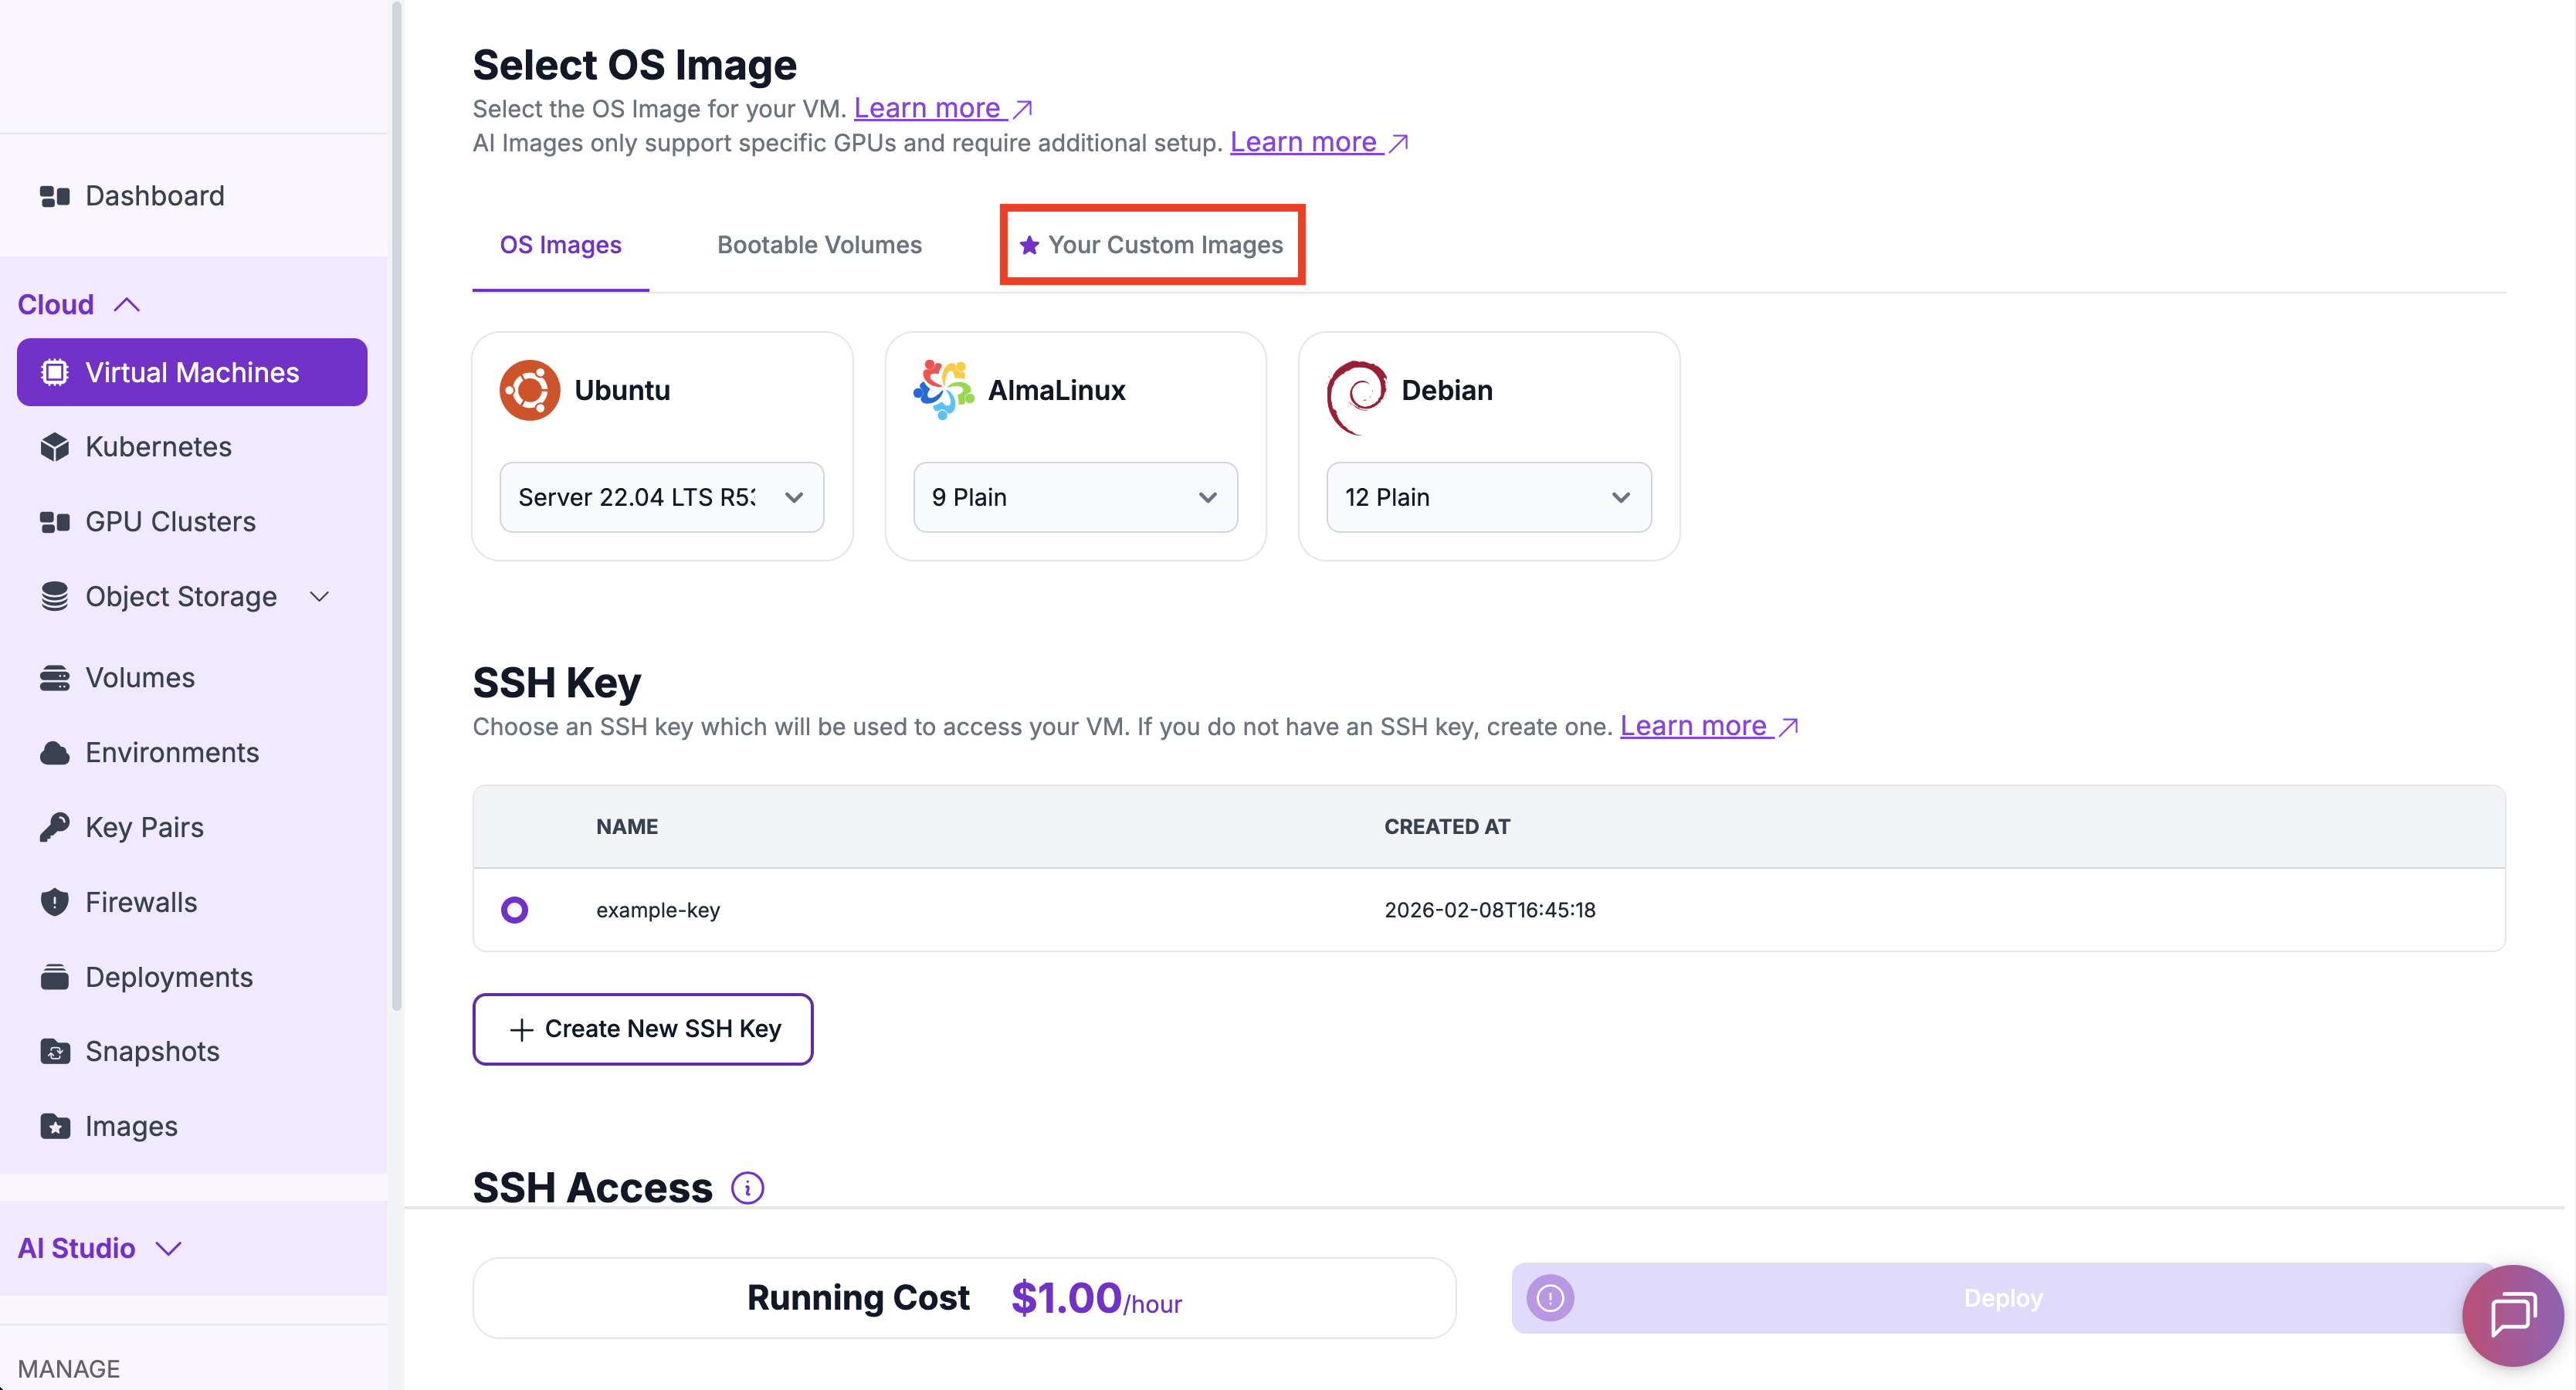
Under the Select OS Image section, click the Your Custom Images tab.
-
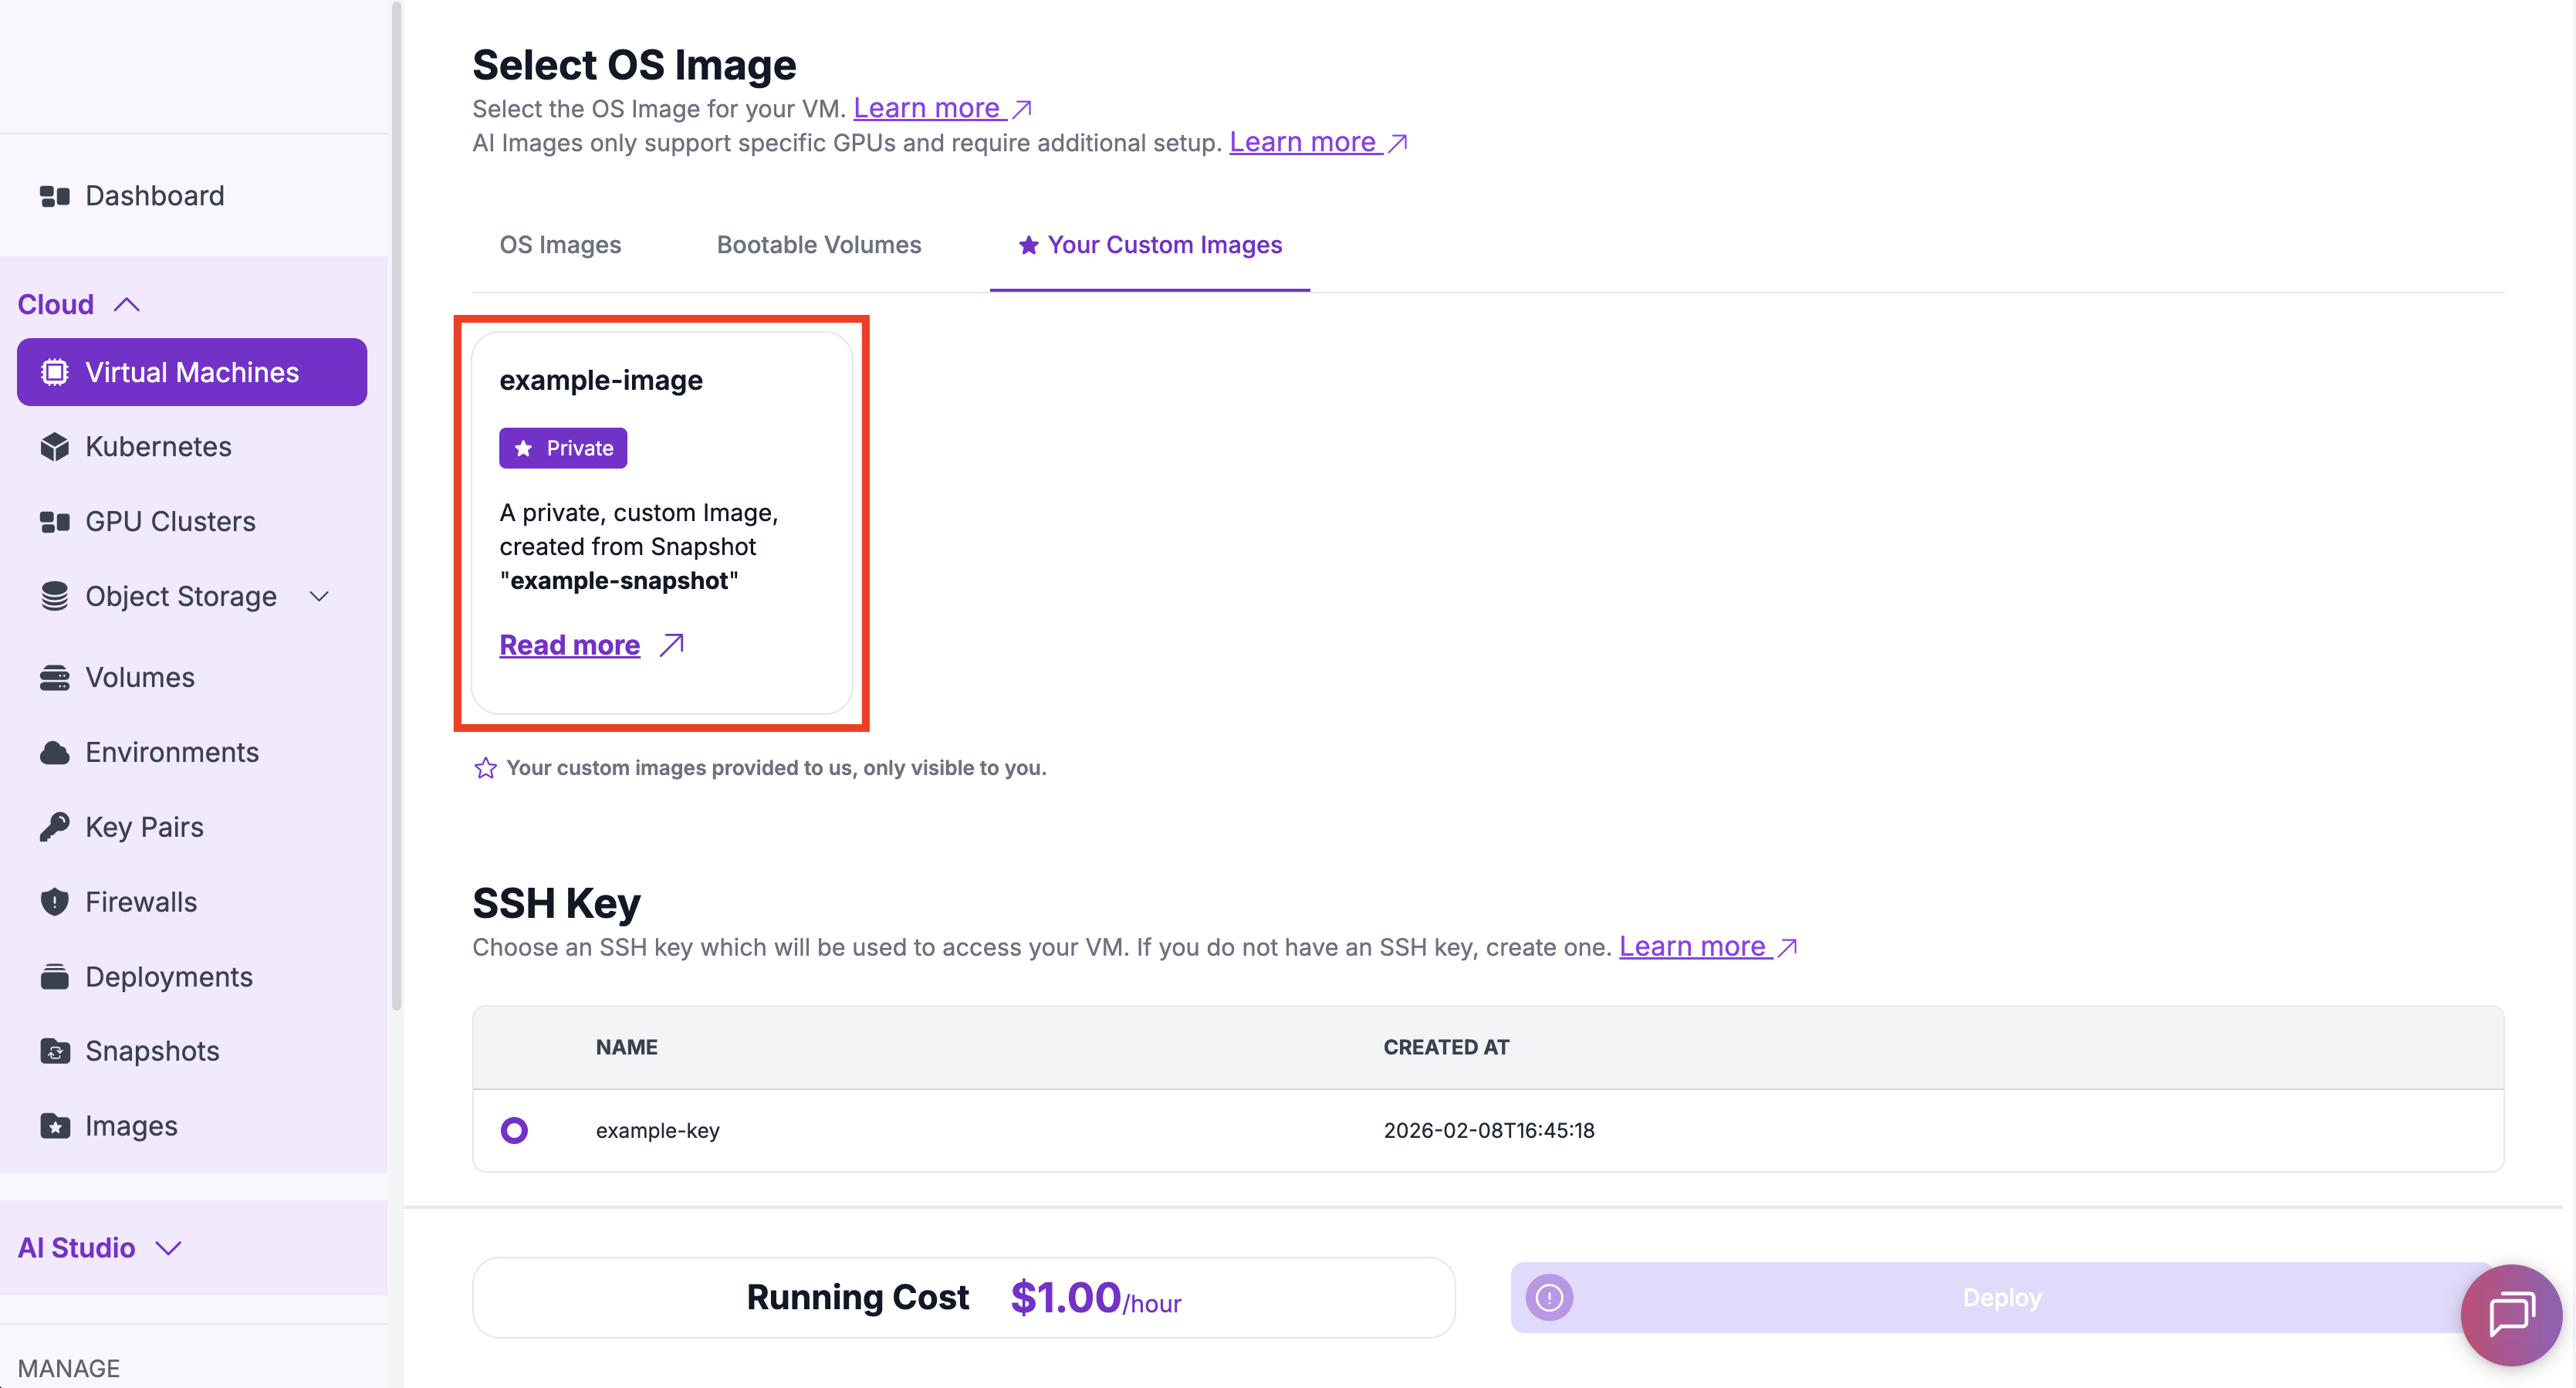
Select the image created from the source VM snapshot.
-
Configure networking, SSH keys, and any optional settings, then deploy the virtual machine.
The VM will start with the same disk state as the original VM, but with the updated hardware configuration.
-
-
Re-attach Volumes (Optional)
Restore access to any additional storage volumes that were attached to the original VM.
- Navigate to the Volumes page and attach the required volumes to the new VM.
- Verify mount points and disk availability inside the operating system.
-
Validate and Clean Up
Confirm that the new VM is operating as expected, then remove the original resources.
- Verify that the VM with the new flavor is running correctly.
- Delete the original VM once validation is complete, if it is no longer required.
- Remove the snapshot and intermediate image if they are no longer needed.