Overview
On-demand GPU or CPU virtual machines you provision in minutes and pay for by the hour.
A virtual machine (VM) on Hyperstack is on-demand GPU or CPU compute that you provision in minutes and pay for by the hour. You choose a hardware flavor, a region and environment, an operating system image, and an SSH key, then deploy a single VM or a fleet of identical ones.
This page is the complete guide to deploying, configuring, connecting to, and managing VMs across their full lifecycle. If you are deploying for the first time, the Getting Started guide walks you through one deployment end to end.
How Virtual Machines Work
Every VM is built from four core choices you make at deployment: its hardware flavor, where it runs, the operating system it boots, and how you access it, plus a set of optional settings you can add. Understanding these building blocks makes every later decision (sizing, storage, networking, cost) straightforward.
Flavors
A flavor is a preset combination of GPU, CPU, RAM, and system disk that you select as a single unit. The flavor determines the GPU model and count, the number of CPUs, the amount of RAM in GB, and the root and ephemeral disk capacity allocated to your VM.
Hyperstack offers GPU flavors across the NVIDIA A100, H100, H200, B200, B300, L40, and RTX families, plus CPU-only flavors for orchestration and lightweight services. In the deploy form, each flavor appears as a card with a GPU-count dropdown (such as 1×, 2×, 4×, or 8×). Two variants change a flavor's behavior:
- Spot flavors run on surplus capacity at a reduced hourly rate and can be reclaimed at any time, so they suit fault-tolerant, interruptible workloads.
- Large root disk flavors (suffixed
-bigroot) reallocate ephemeral capacity into a larger root disk for workloads that need more persistent system storage.
See Flavors for the full catalog and per-model specifications.
Regions and environments
VMs are deployed into an environment, a resource container that holds your VMs, volumes, and SSH keys. Each environment belongs to one region, a distinct geographic location backed by a dedicated data center. A flavor is only available in the regions where that hardware is deployed, so the environment you pick and the flavor you pick are linked. You can create an environment ahead of time or inline while deploying.
Operating system images
Each VM boots from an operating system image. Hyperstack provides Ubuntu, AlmaLinux, and Debian images, including variants with NVIDIA drivers and the CUDA toolkit pre-installed and variants bundled with Docker. The deploy form presents three image sources as tabs:
- OS Images: the standard Hyperstack image catalog.
- Bootable Volumes: deploy from a bootable volume so the OS lives on persistent storage.
- Your Custom Images: deploy from a custom image you created from a snapshot.
Lifecycle states
After deployment a VM moves through a set of states shown as a status badge in the console, such as BUILD while it provisions, ACTIVE while it runs, SHUTOFF when stopped, and HIBERNATED when its hardware is released. These states determine what you are billed and which actions are available. See Managing Virtual Machines and VM States and Billing for details.
Deploying a Virtual Machine
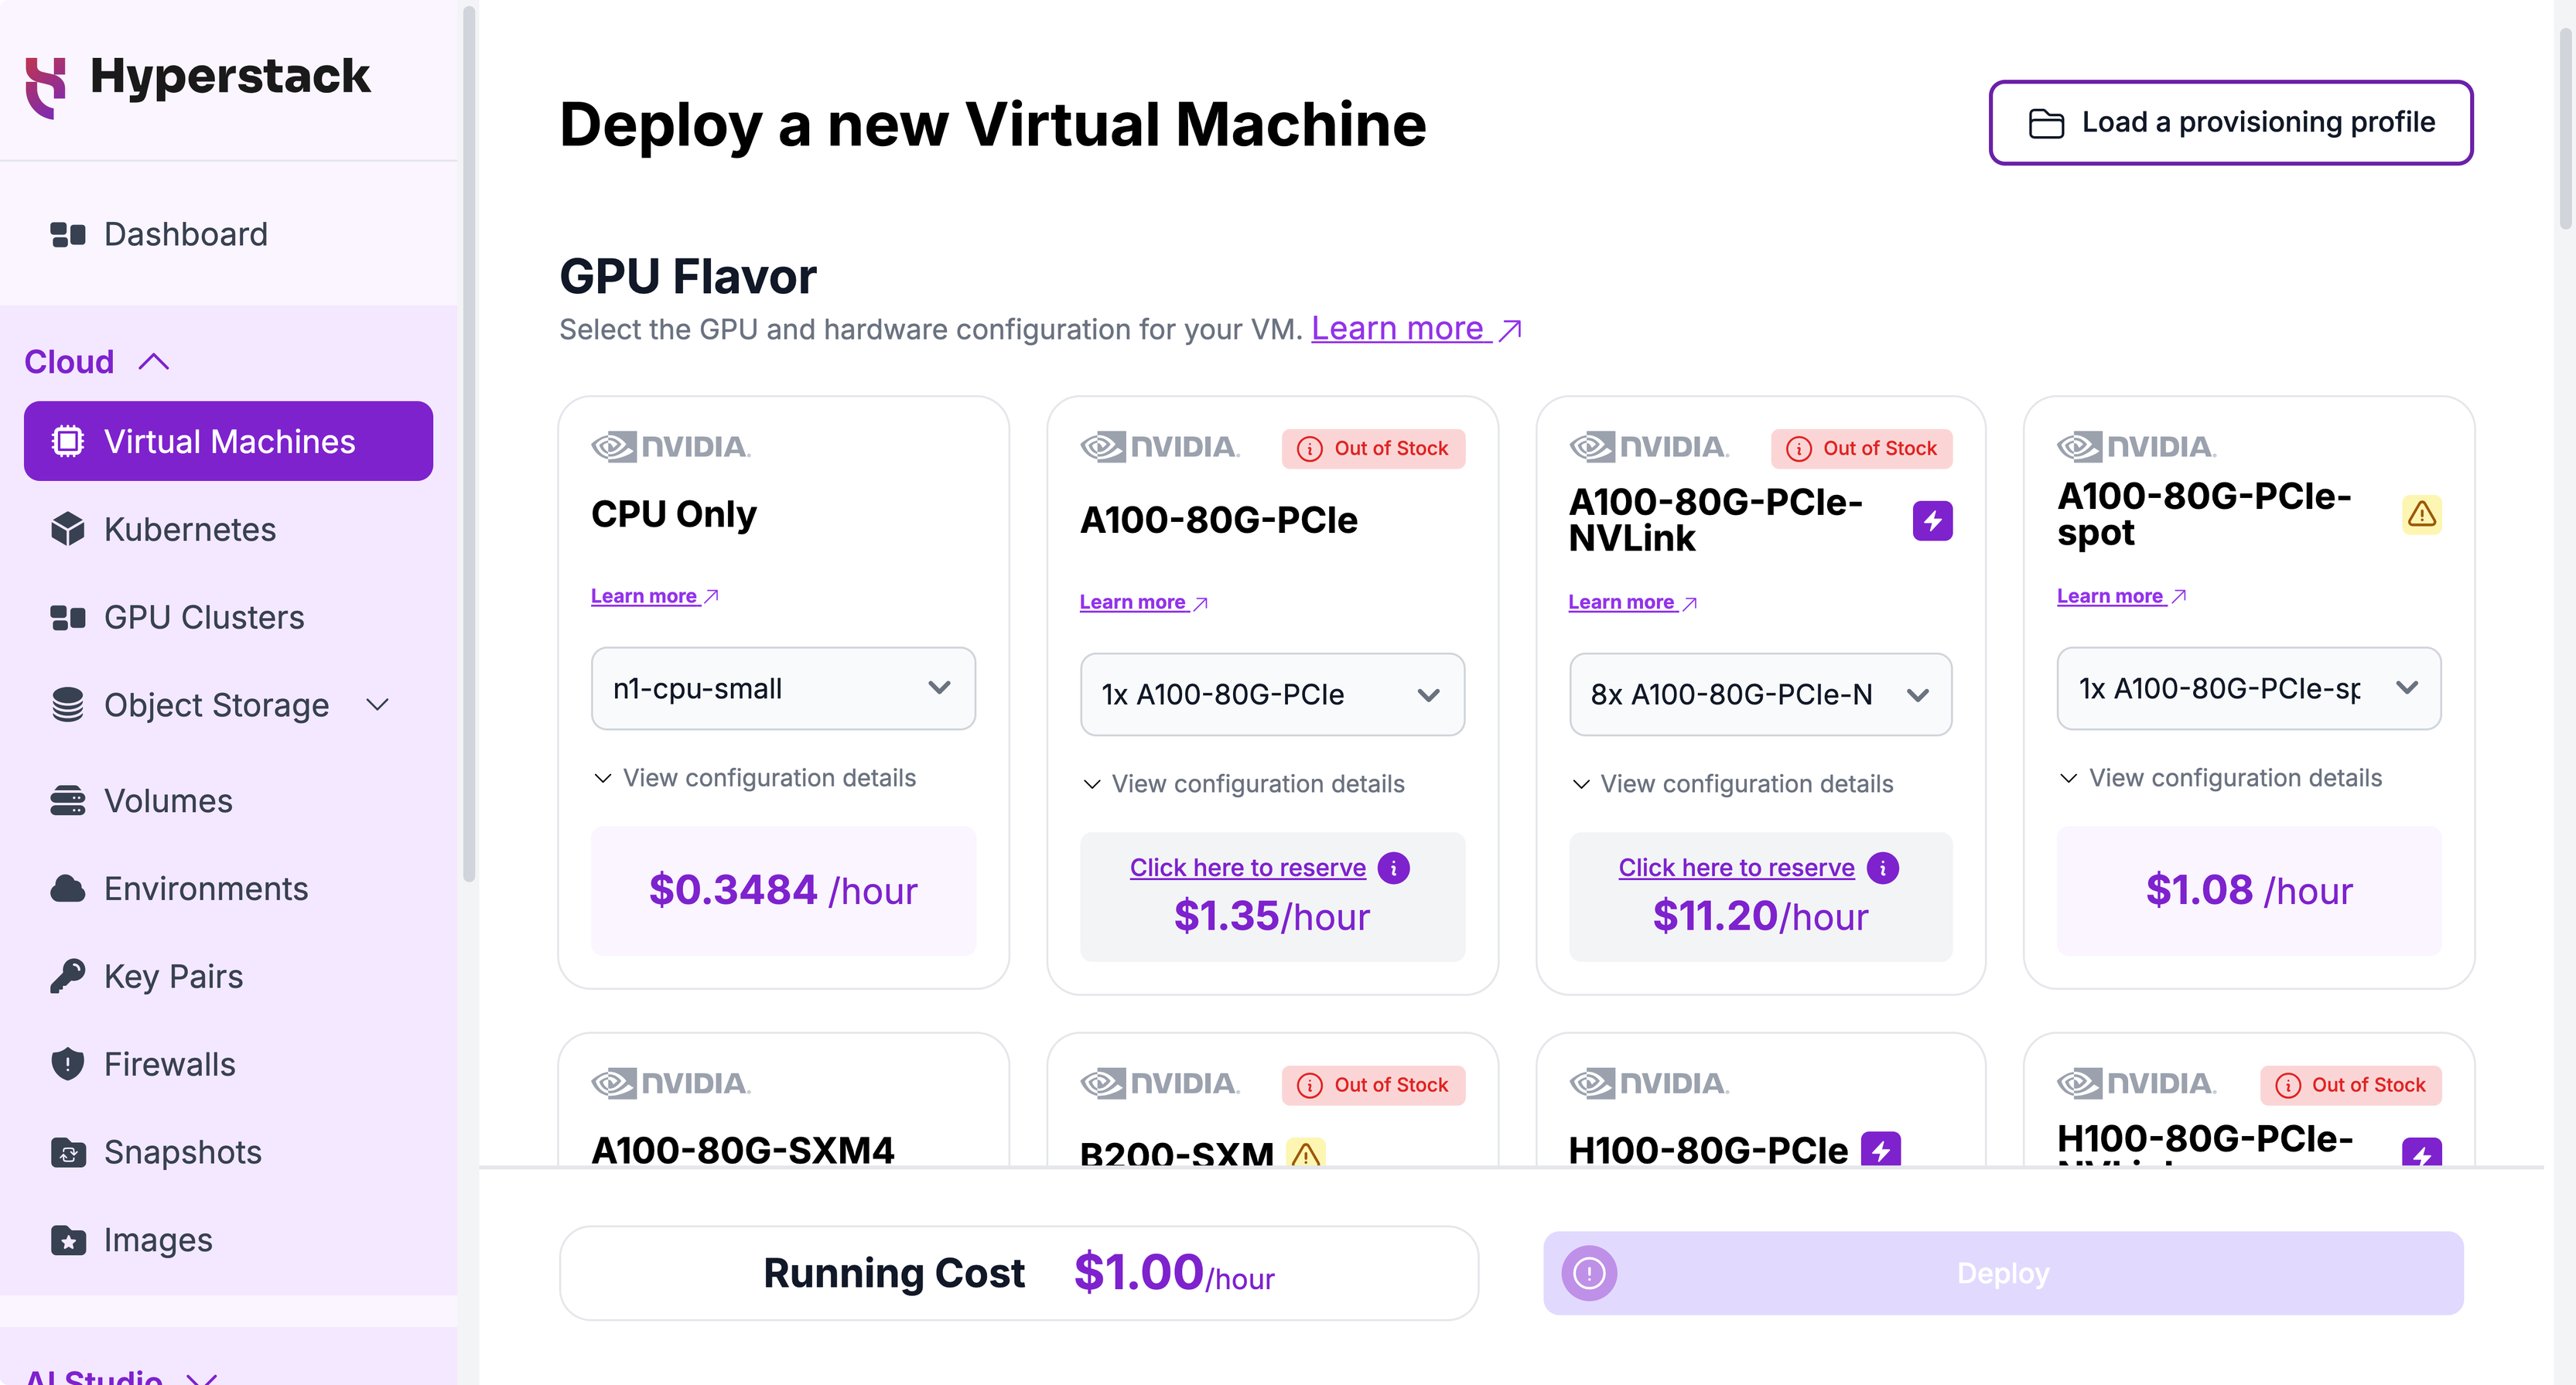
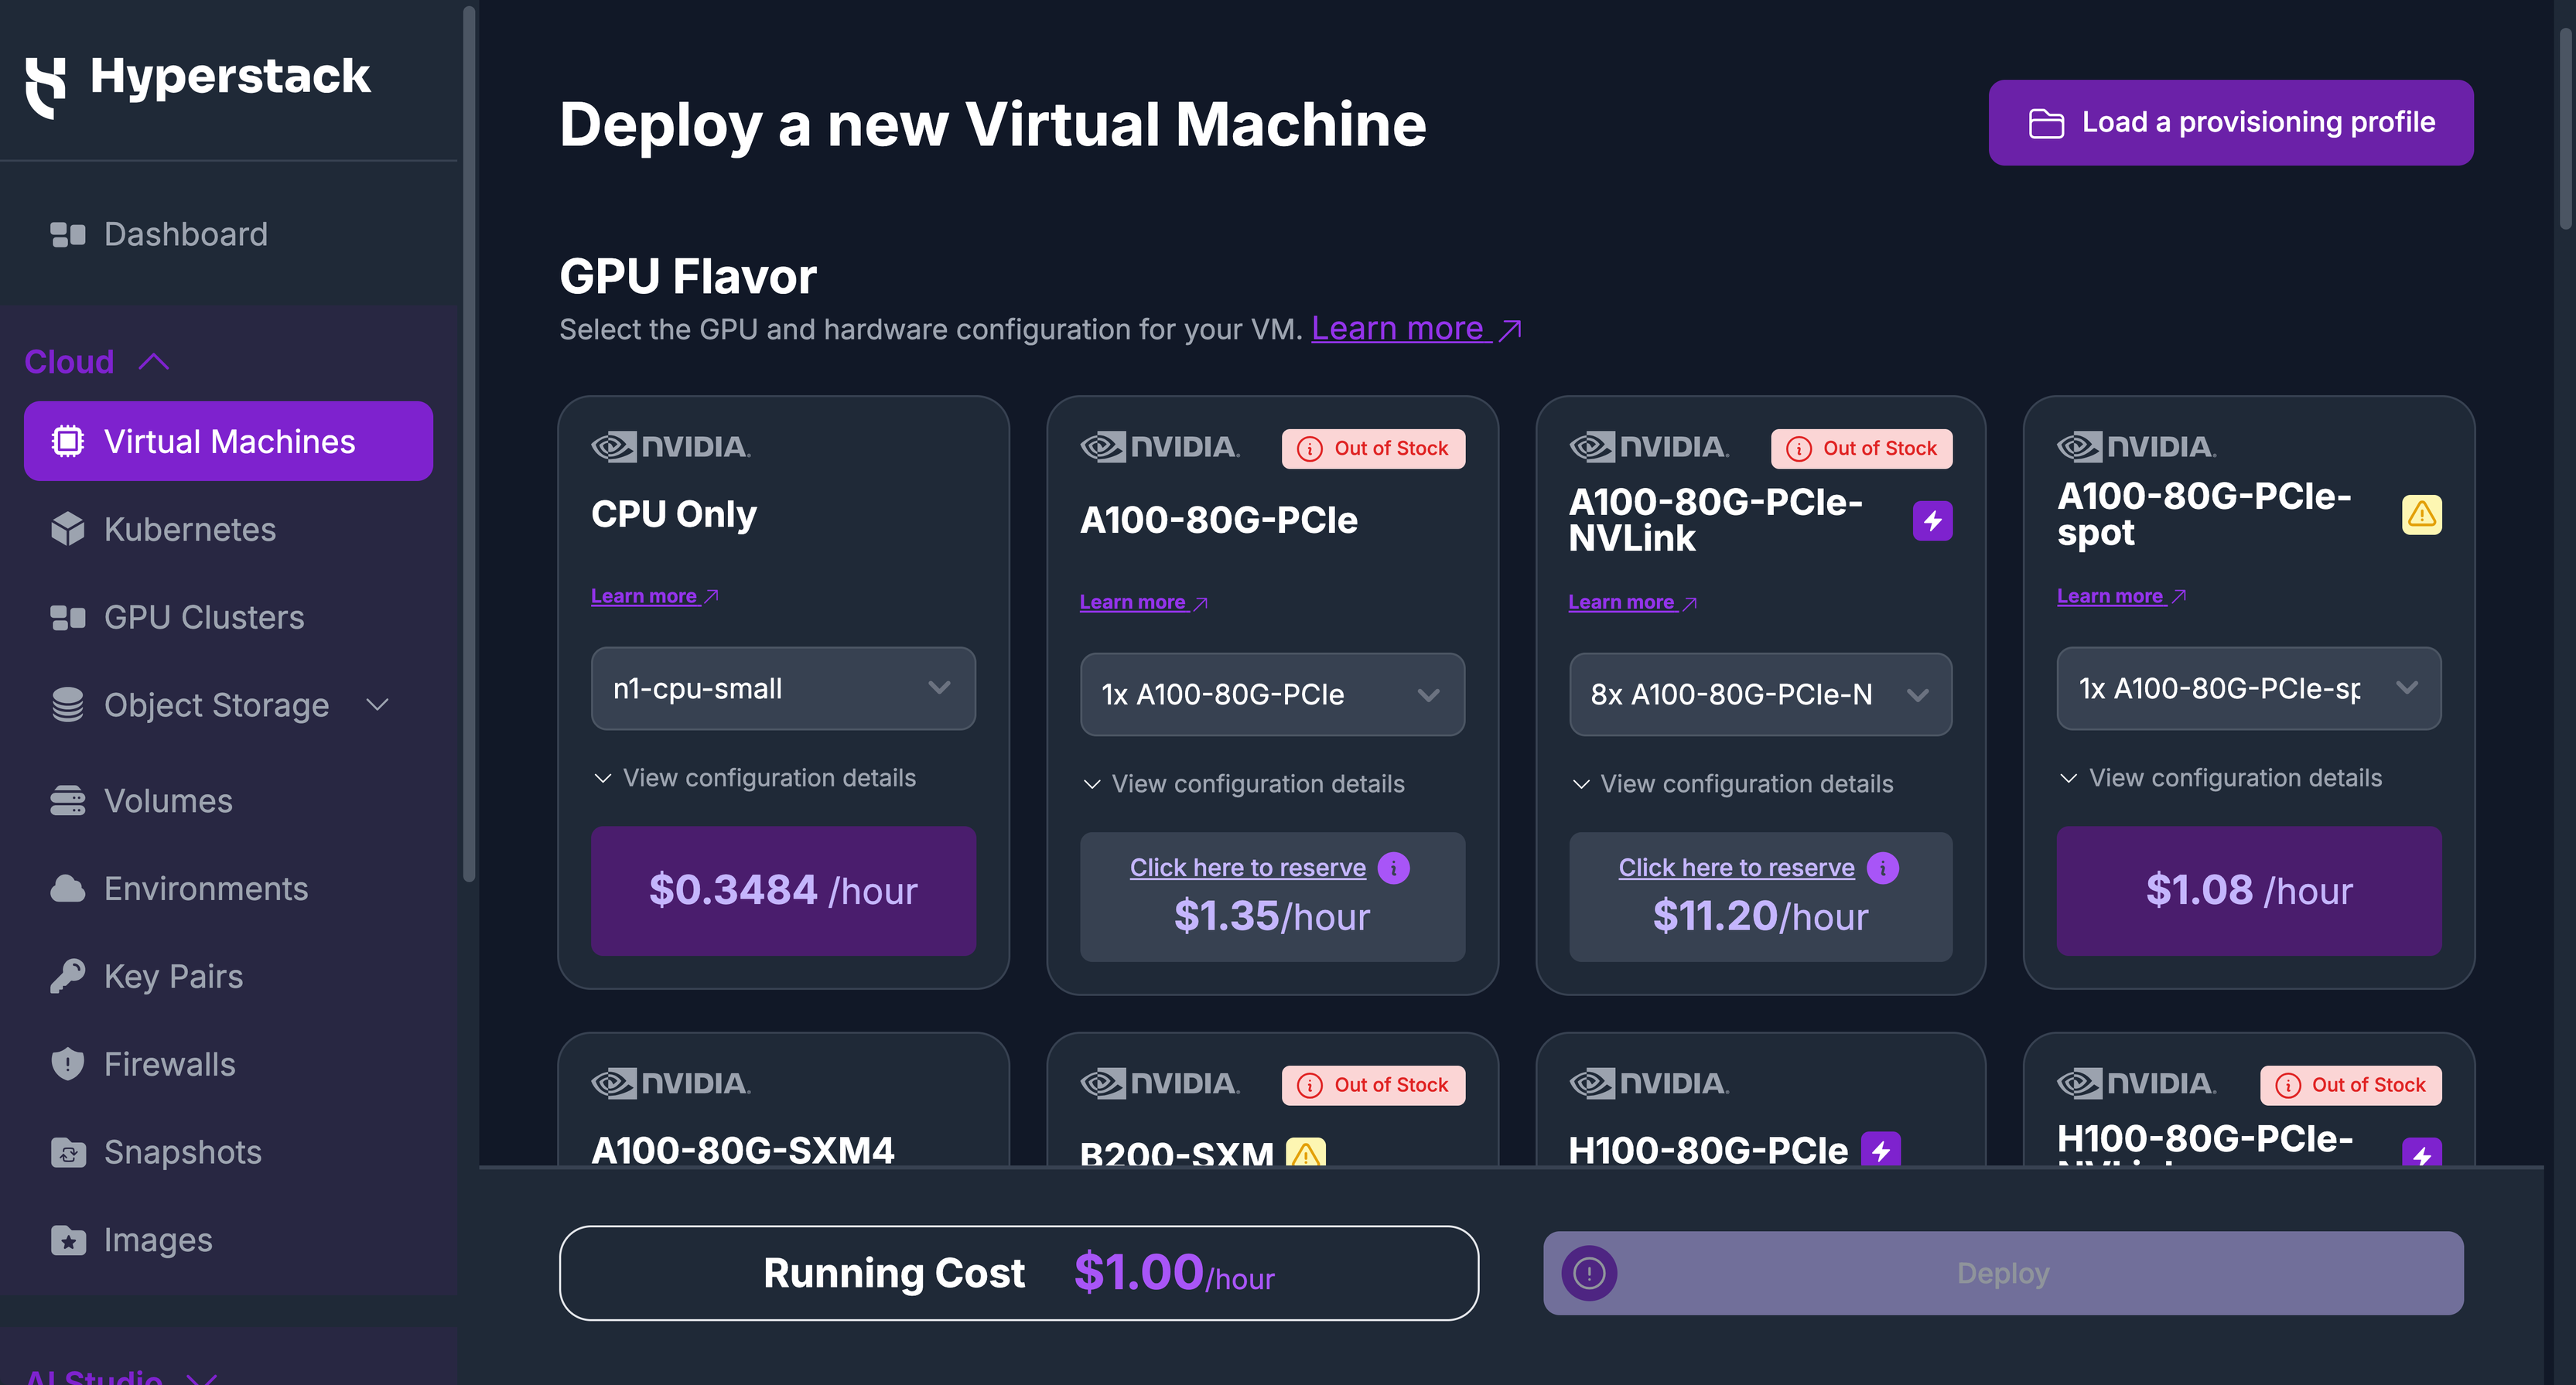
You deploy and configure VMs from the Deploy New Virtual Machine page, reached from the Virtual Machines page in the console. The form is a single scrolling configuration surface with a live Running Cost that updates as you change the flavor or toggle paid add-ons.
Permissions for organization members
If you deploy in an organization you don't own, your user role needs billing permissions as well as virtual machine permissions. Hyperstack checks the organization's credit balance before it lets you initiate resource actions, such as deploying a virtual machine or restoring one from hibernation. Reading that balance requires a billing permission.
The built-in VirtualMachinePermissions policy covers virtual machine actions only. A role for a member who deploys or restores virtual machines includes the following:
| Policy or permission | Why it is needed |
|---|---|
policy:VirtualMachinePermissions, or individual permissions such as virtual-machine:create and virtual-machine:restore | Deploying and managing virtual machines |
billing:credit-view | Reading the organization's credit balance, which is checked before you can deploy or restore a virtual machine |
billing:view | Viewing the organization's billing information |
The AllPermissions policy already includes these billing permissions.
A member whose role lacks these billing permissions sees the organization's credit balance as $0, even when the organization has credit. The Deploy and Restore buttons stay disabled for that member. To fix this, ask your organization owner to add billing:credit-view and billing:view to your user role.
Core configuration
These are the choices every deployment makes, in the order the form presents them:
-
Select a flavor
Click the GPU or CPU flavor card that fits your workload, then choose the GPU count from the dropdown inside the card. The card shows the per-hour price; out-of-stock flavors show a reservation link instead.
-
Choose an environment
Pick the environment where the VM will run. Only environments in a region compatible with your selected flavor are selectable. Click Create New Environment to add one inline.
-
Select an OS image
Choose an image from the OS Images, Bootable Volumes, or Your Custom Images tab. A CUDA-ready Ubuntu image is selected by default.
-
Choose an SSH key
Select an existing SSH key for the environment, or click Create New SSH Key to import or generate one. SSH keys are scoped to an environment.
-
Set network access
Enable SSH Access to allow inbound traffic on port 22, and enable Public IP Address to make the VM reachable from the internet. See Networking and Security.
-
Set the number of VMs
Increase Number of VMs to deploy to provision several identical VMs in one action. Each one receives a unique name.
-
Deploy
Optionally configure Additional settings, then review the Final Configuration and Price Breakdown and click Deploy in the cost bar at the bottom of the page.
Additional settings
Click Configure Additional Settings to expand optional configuration:
- Virtual Machine Name: replace the auto-generated name with your own. The form checks name availability as you type.
- Callback URL: receive webhook notifications when actions are taken on the VM.
- Jupyter Notebook: auto-install Jupyter, reachable on port 8888. This requires Public IP Address to be enabled.
- Cloud-init Script: run first-boot configuration in YAML or Bash so the VM arrives with your tooling installed.
- Enhanced Monitoring: on by default, installs an agent at first boot that collects detailed system and GPU metrics.
- Labels: tag the VM for filtering and organization.
- Firewall Rules: add inbound and outbound rules that apply to this VM only.
- Provisioning Profiles: save the current configuration as a reusable template, or load a saved one from the top of the page.
Connecting to your VM
You connect to a Linux VM over Secure Shell (SSH) using the private key that pairs with the public key you selected at deployment. To connect over SSH, the VM needs SSH Access enabled and a public IP address attached, both of which you can set on the deploy form or change later from the VM's detail page.
Once the VM is ACTIVE and has a public IP, follow Access your virtual machine via SSH for the connection command and key permissions. A VM with only a private IP is reachable from other resources on its private network but not from the internet.
Managing Virtual Machines
The VM detail page, reached by clicking a VM's name on the Virtual Machines page, is the hub for managing a deployed VM. The actions menu (⋮) in the top-right exposes the lifecycle actions, and which actions are available depends on the VM's current state:
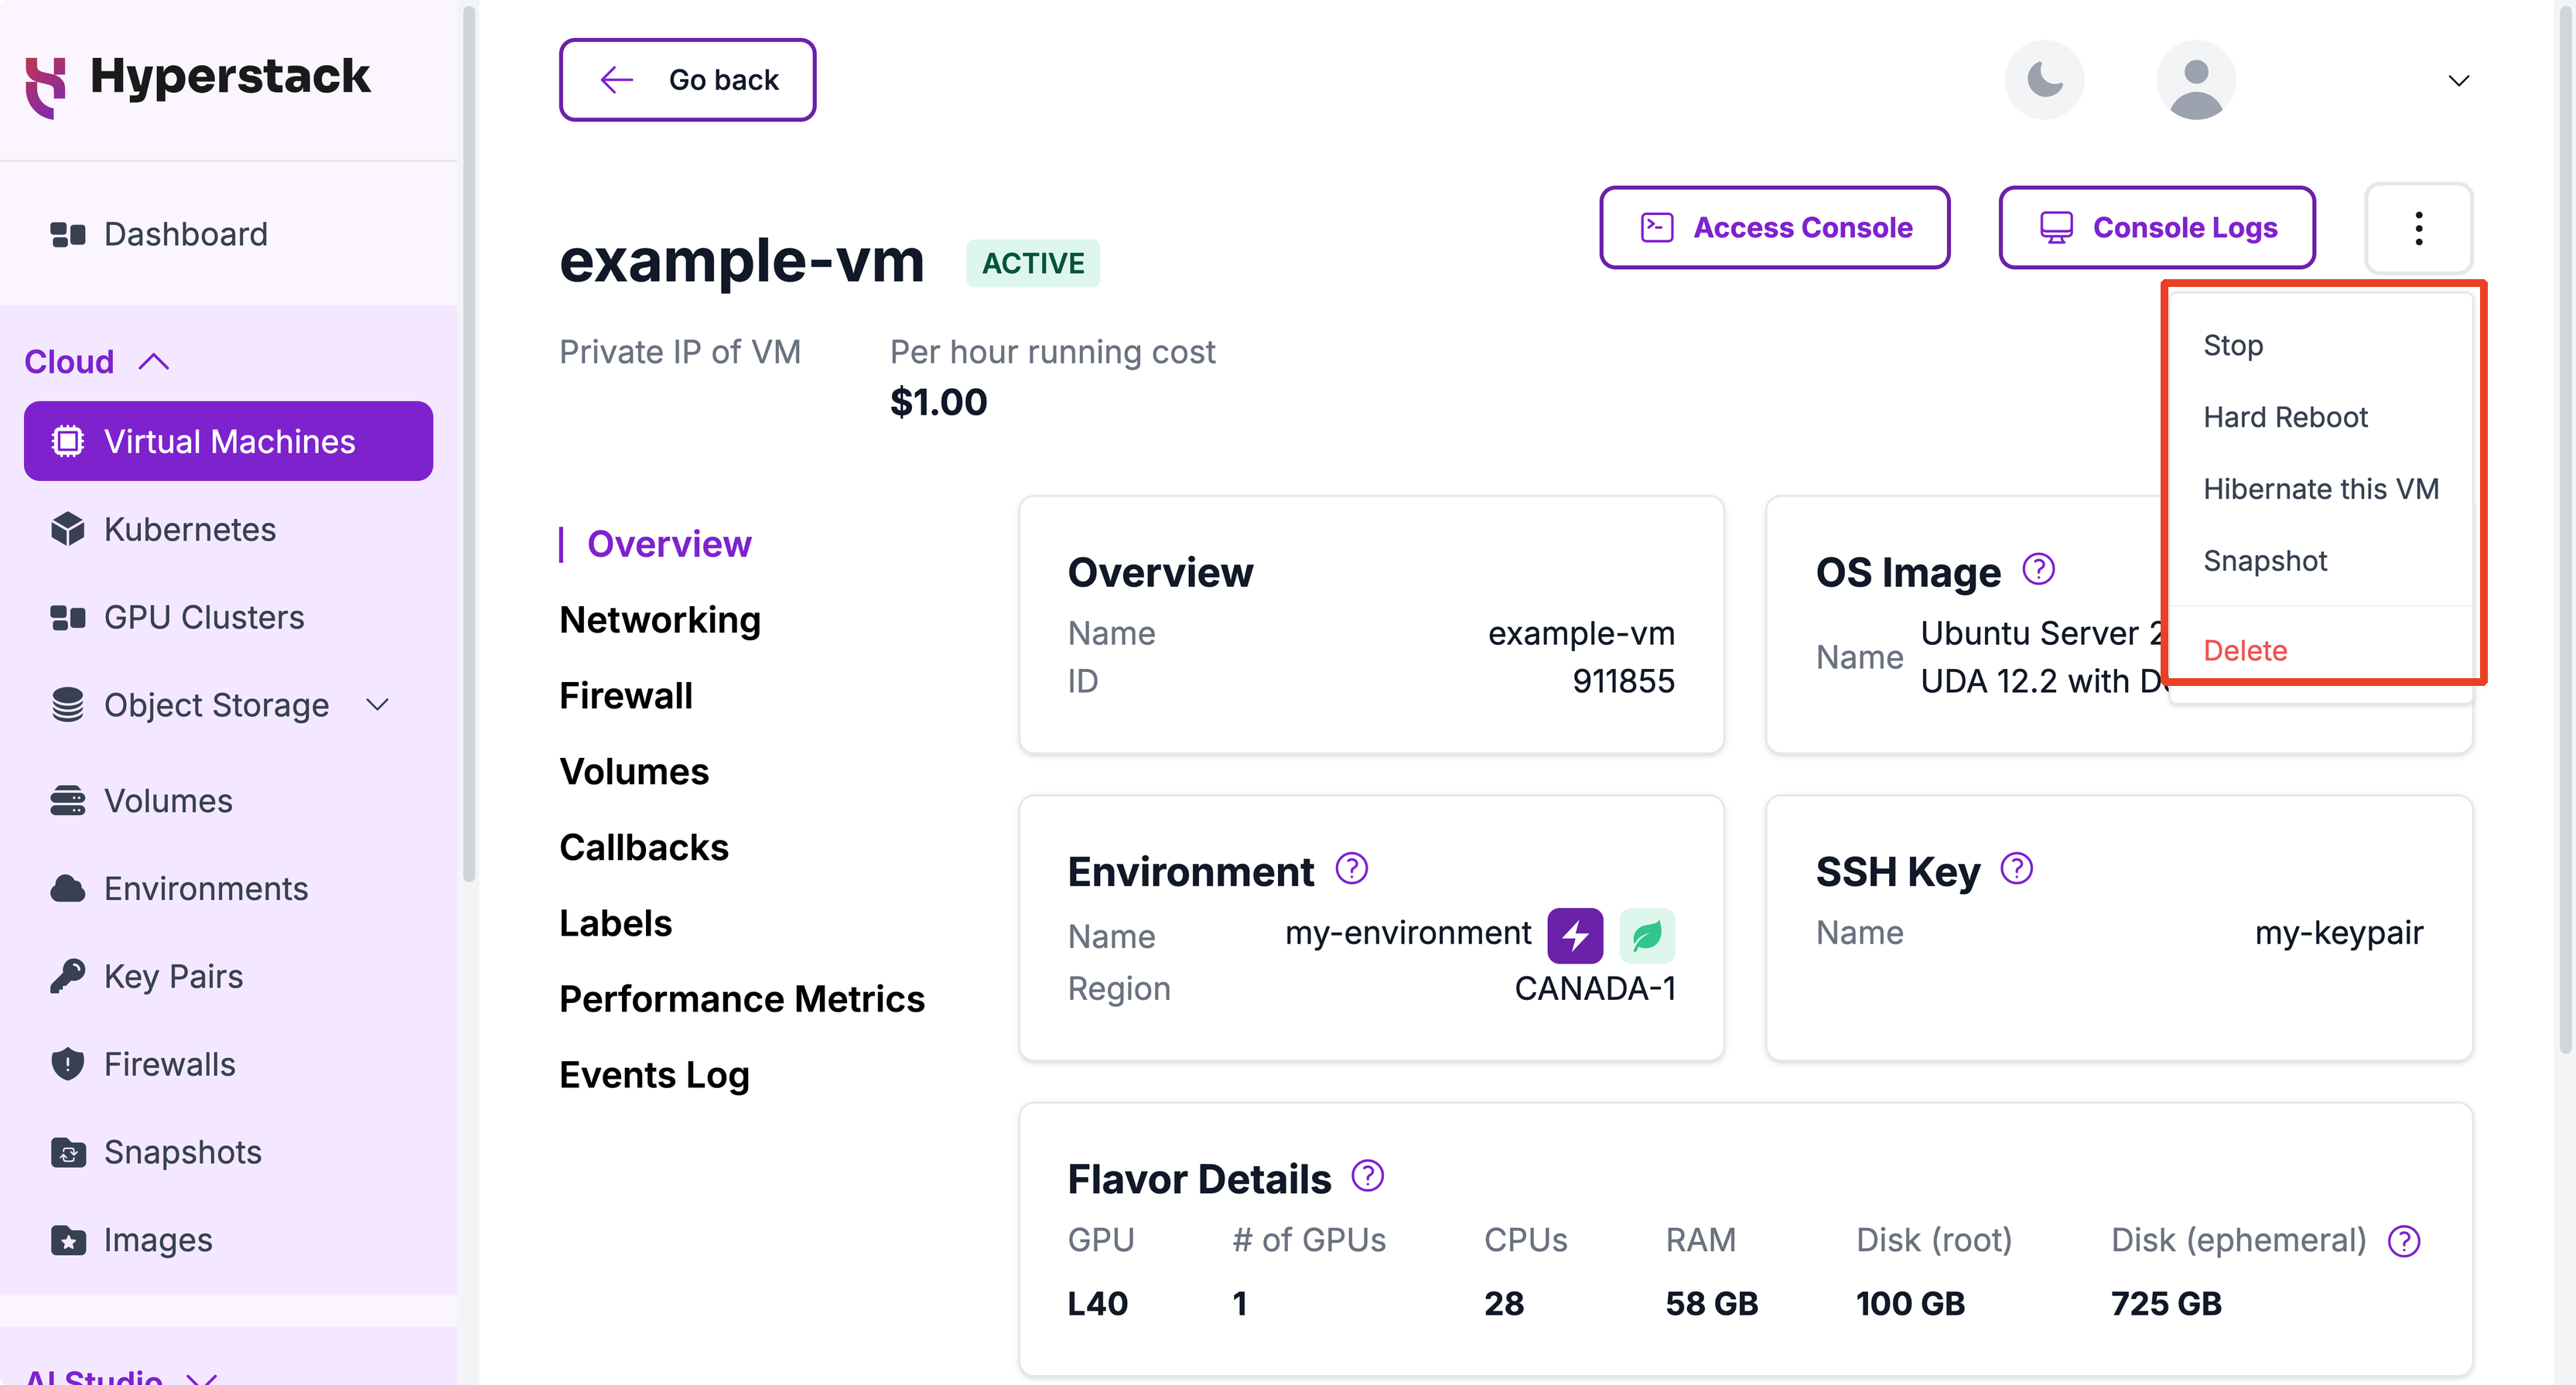
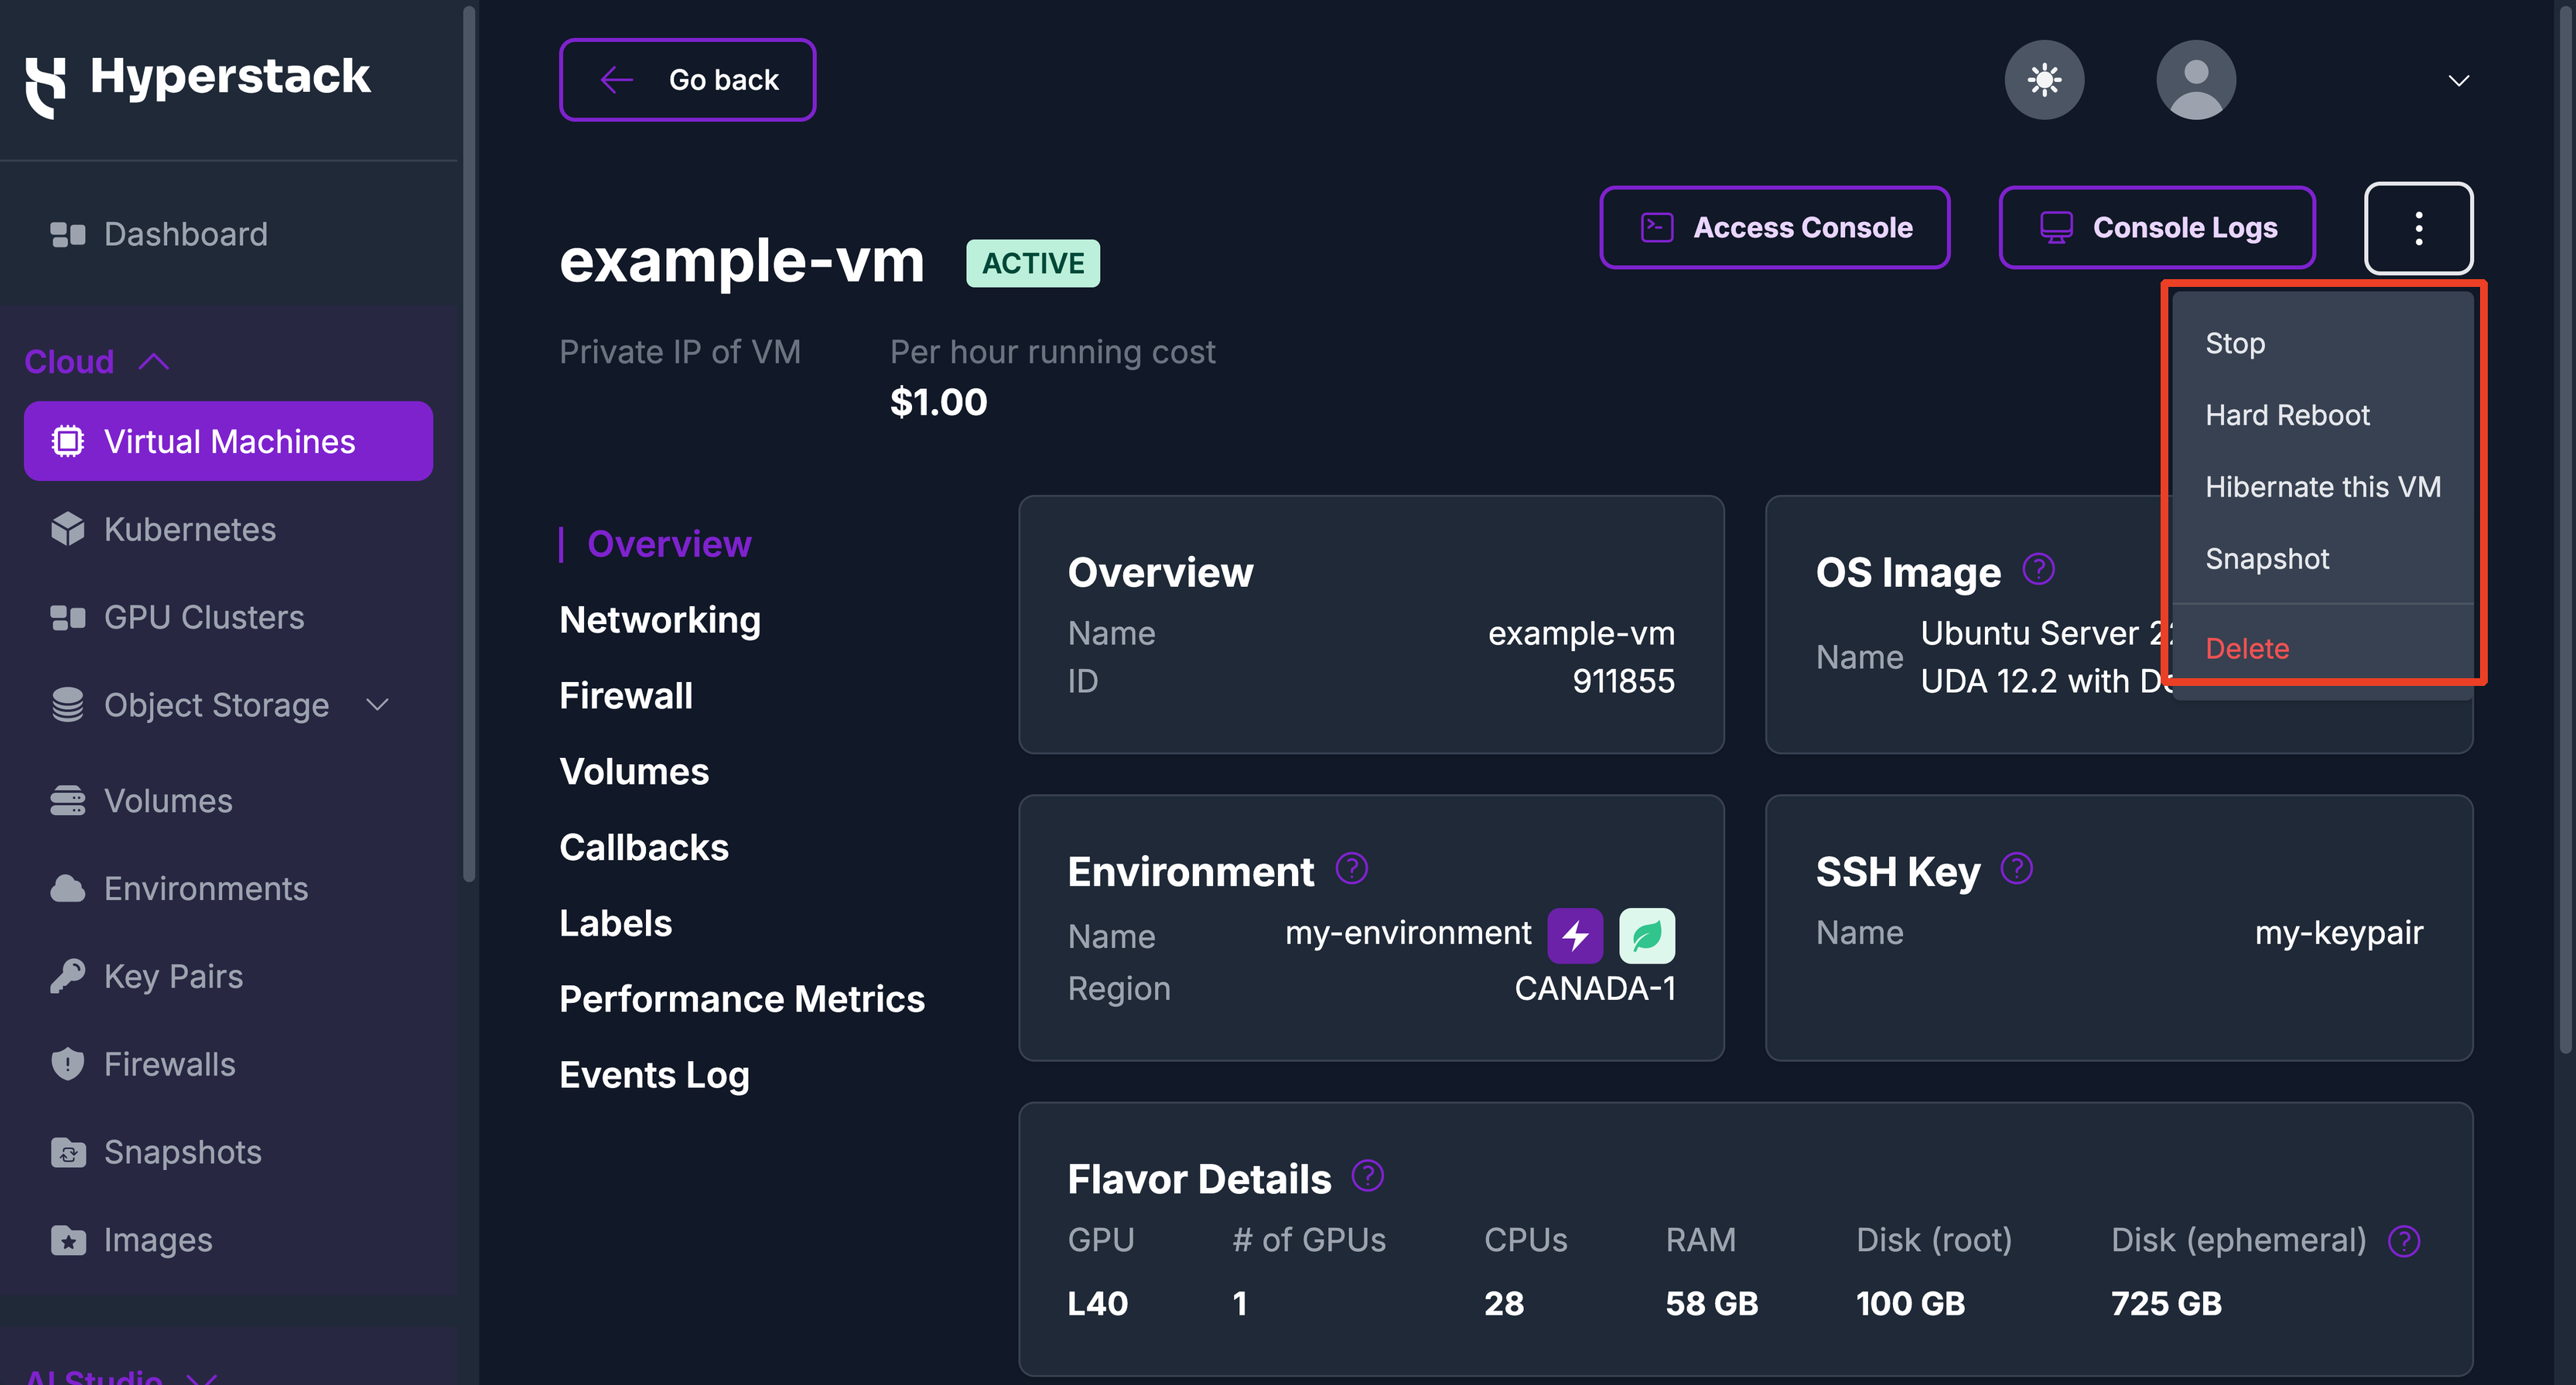
- Stop transitions the VM to
SHUTOFF. A stopped VM keeps all of its resources reserved, so it continues to bill at the running rate. - Start returns a
SHUTOFFVM toACTIVE. - Hard Reboot restarts the operating system and running programs.
- Hibernate this VM saves the VM's configuration and root disk to persistent storage and releases its CPU, GPU, RAM, and ephemeral disk, pausing billing for those resources.
- Snapshot captures the VM's disk as a point-in-time image you can restore or turn into a custom image.
- Delete permanently removes the VM and all data on it.
For the full state machine, billing per state, and step-by-step instructions, see VM Status and State Management.
Hibernation
Hibernation lets you pause a VM without paying for idle hardware. It saves your configuration and root disk to persistent storage and releases the CPU, GPU, RAM, and ephemeral disk, so while the VM is HIBERNATED you are billed only for the saved storage and any retained public IP, not for the compute. The public IP can be kept or released during hibernation, and a released IP is replaced by a new one on restore. Restoring requires the same flavor to be in stock, because hardware is not reserved during hibernation.
Snapshots and custom images
A snapshot captures a VM's root disk at a point in time, useful as a backup before a risky change or as the basis for a reusable custom image you deploy new VMs from. The first snapshot is a full copy, and later snapshots store only the blocks that changed. The VM is SHUTOFF during creation to keep the data consistent. Snapshots are not supported for VMs deployed from bootable volumes.
Changing the flavor
Hyperstack does not change a VM's flavor in place. To move a workload to different hardware, you take a snapshot of the VM, convert that snapshot into a reusable custom image, then deploy a new VM from that image onto the flavor you want. The new VM starts from the same root disk state (operating system, installed software, and configuration) with the new GPU, CPU, RAM, and disk allocation. Because a snapshot captures the root disk and not the ephemeral disk, back up any ephemeral data first. The full workflow is in Change the Flavor of a Virtual Machine.
Hibernation and snapshots are not available on spot flavors or large root disk flavors. On a VM running one of these flavors, those actions appear disabled in the actions menu.
Monitoring and logs
Each VM's detail page collects the data you need to watch its health and diagnose problems without leaving the console:
- Performance Metrics: time-series charts of CPU, memory, disk I/O, and network I/O over a selectable period, for spotting saturation or idle resources.
- Enhanced Monitoring: an agent inside the VM that adds per-GPU utilization, memory, temperature, and power draw, plus serving metrics on a dedicated inference machine, queryable from Grafana or a Prometheus-compatible API.
- Events Log: a timestamped record of every lifecycle action taken on the VM, including the user who performed it and the outcome.
- Console Logs: the VM's boot and runtime console output, the first place to look when a VM does not boot or a cloud-init script does not run. The VM must be
ACTIVEto retrieve them. - Callbacks: a webhook URL that receives an event each time an action is taken on the VM, so external systems can react to lifecycle changes automatically.
Managing via the API
Every action in the console has a programmatic equivalent in the Hyperstack API, so you can deploy and manage VMs from scripts and automation. Requests authenticate with an API key; see the API Reference for full schemas and examples.
| Operation | Endpoint |
|---|---|
| Create virtual machines | POST/core/virtual-machines |
| List virtual machines | GET/core/virtual-machines |
| Retrieve virtual machine details | GET/core/virtual-machines/{id} |
| Start a virtual machine | GET/core/virtual-machines/{id}/start |
| Stop a virtual machine | GET/core/virtual-machines/{id}/stop |
| Hard reboot a virtual machine | GET/core/virtual-machines/{id}/hard-reboot |
| Hibernate a virtual machine | GET/core/virtual-machines/{id}/hibernate |
| Restore a virtual machine from hibernation | GET/core/virtual-machines/{id}/hibernate-restore |
| Create a snapshot from a virtual machine | POST/core/snapshots |
| Delete a virtual machine | DELETE/core/virtual-machines/{id} |
Storage
A VM's attached storage falls into two categories: local disk tied to the VM's lifecycle, and network-attached volumes that persist beyond it. Knowing which one holds a given piece of data is what prevents losing work across hibernation or deletion.
Local disk is built into the flavor and attached directly to the VM:
- The root disk is local NVMe storage that holds the operating system and system files. It persists for as long as the VM exists and is removed when you delete the VM.
- The ephemeral disk is a larger temporary drive, sized by the flavor, for the active workload such as datasets and model caches. It is non-persistent: hibernating or deleting the VM clears it.
Persistent volumes are network-attached and managed independently of any single VM:
- A Shared Storage Volume (SSV) is network-based block storage you create once and attach to a VM. Data on an SSV survives hibernation, deletion, and reattachment to another VM, so it is where anything you need to keep belongs.
- A bootable volume is an SSV with an OS image installed, letting the operating system itself live on persistent storage instead of the local root disk.
Beyond the storage attached to a VM, Object Storage holds VM data such as datasets, logs, and backups in S3-compatible buckets. It is not mounted as a drive: your VM reads and writes those buckets over the network with standard S3 tools, so the data stays reachable from any VM or external service.
The ephemeral disk is cleared on both hibernation and deletion, and the root disk is removed on deletion. Before you hibernate or delete a VM, move anything you need to keep to a Shared Storage Volume, as described in How to Save Ephemeral Data.
Networking and Security
Every VM has a private IP for internal traffic and can take a public IP for internet access, with firewalls governing what is allowed in and out.
- Public IP address: a public IPv4 address makes the VM reachable from the internet, and is required to reach it over SSH from outside the platform. A public IP is not permanently bound to a VM: it can be kept or released during hibernation, and a released IP is replaced with a new one on restore.
- Private IP address: every VM receives a private IP at deployment for communication with other resources on the same private network, with no exposure to the internet.
- Firewalls: firewall rules control inbound and outbound traffic by direction, protocol, port range, and source or destination IP. You can attach a shared firewall reused across many VMs, or add direct rules that apply to a single VM, and the VM detail page exposes quick SSH Access (port 22) and ICMP Access (ping) toggles.
- High-speed networking: SR-IOV networking provides high inter-VM bandwidth for distributed, multi-node workloads, available in network-optimized environments.
Pricing
VMs are billed by the hour based on the flavor you choose and any paid add-ons, with all rates available from the Pricebook API or as shown in the console. The deploy form shows a live Running Cost and a Final Configuration and Price Breakdown so you can see the all-in hourly rate before deploying.
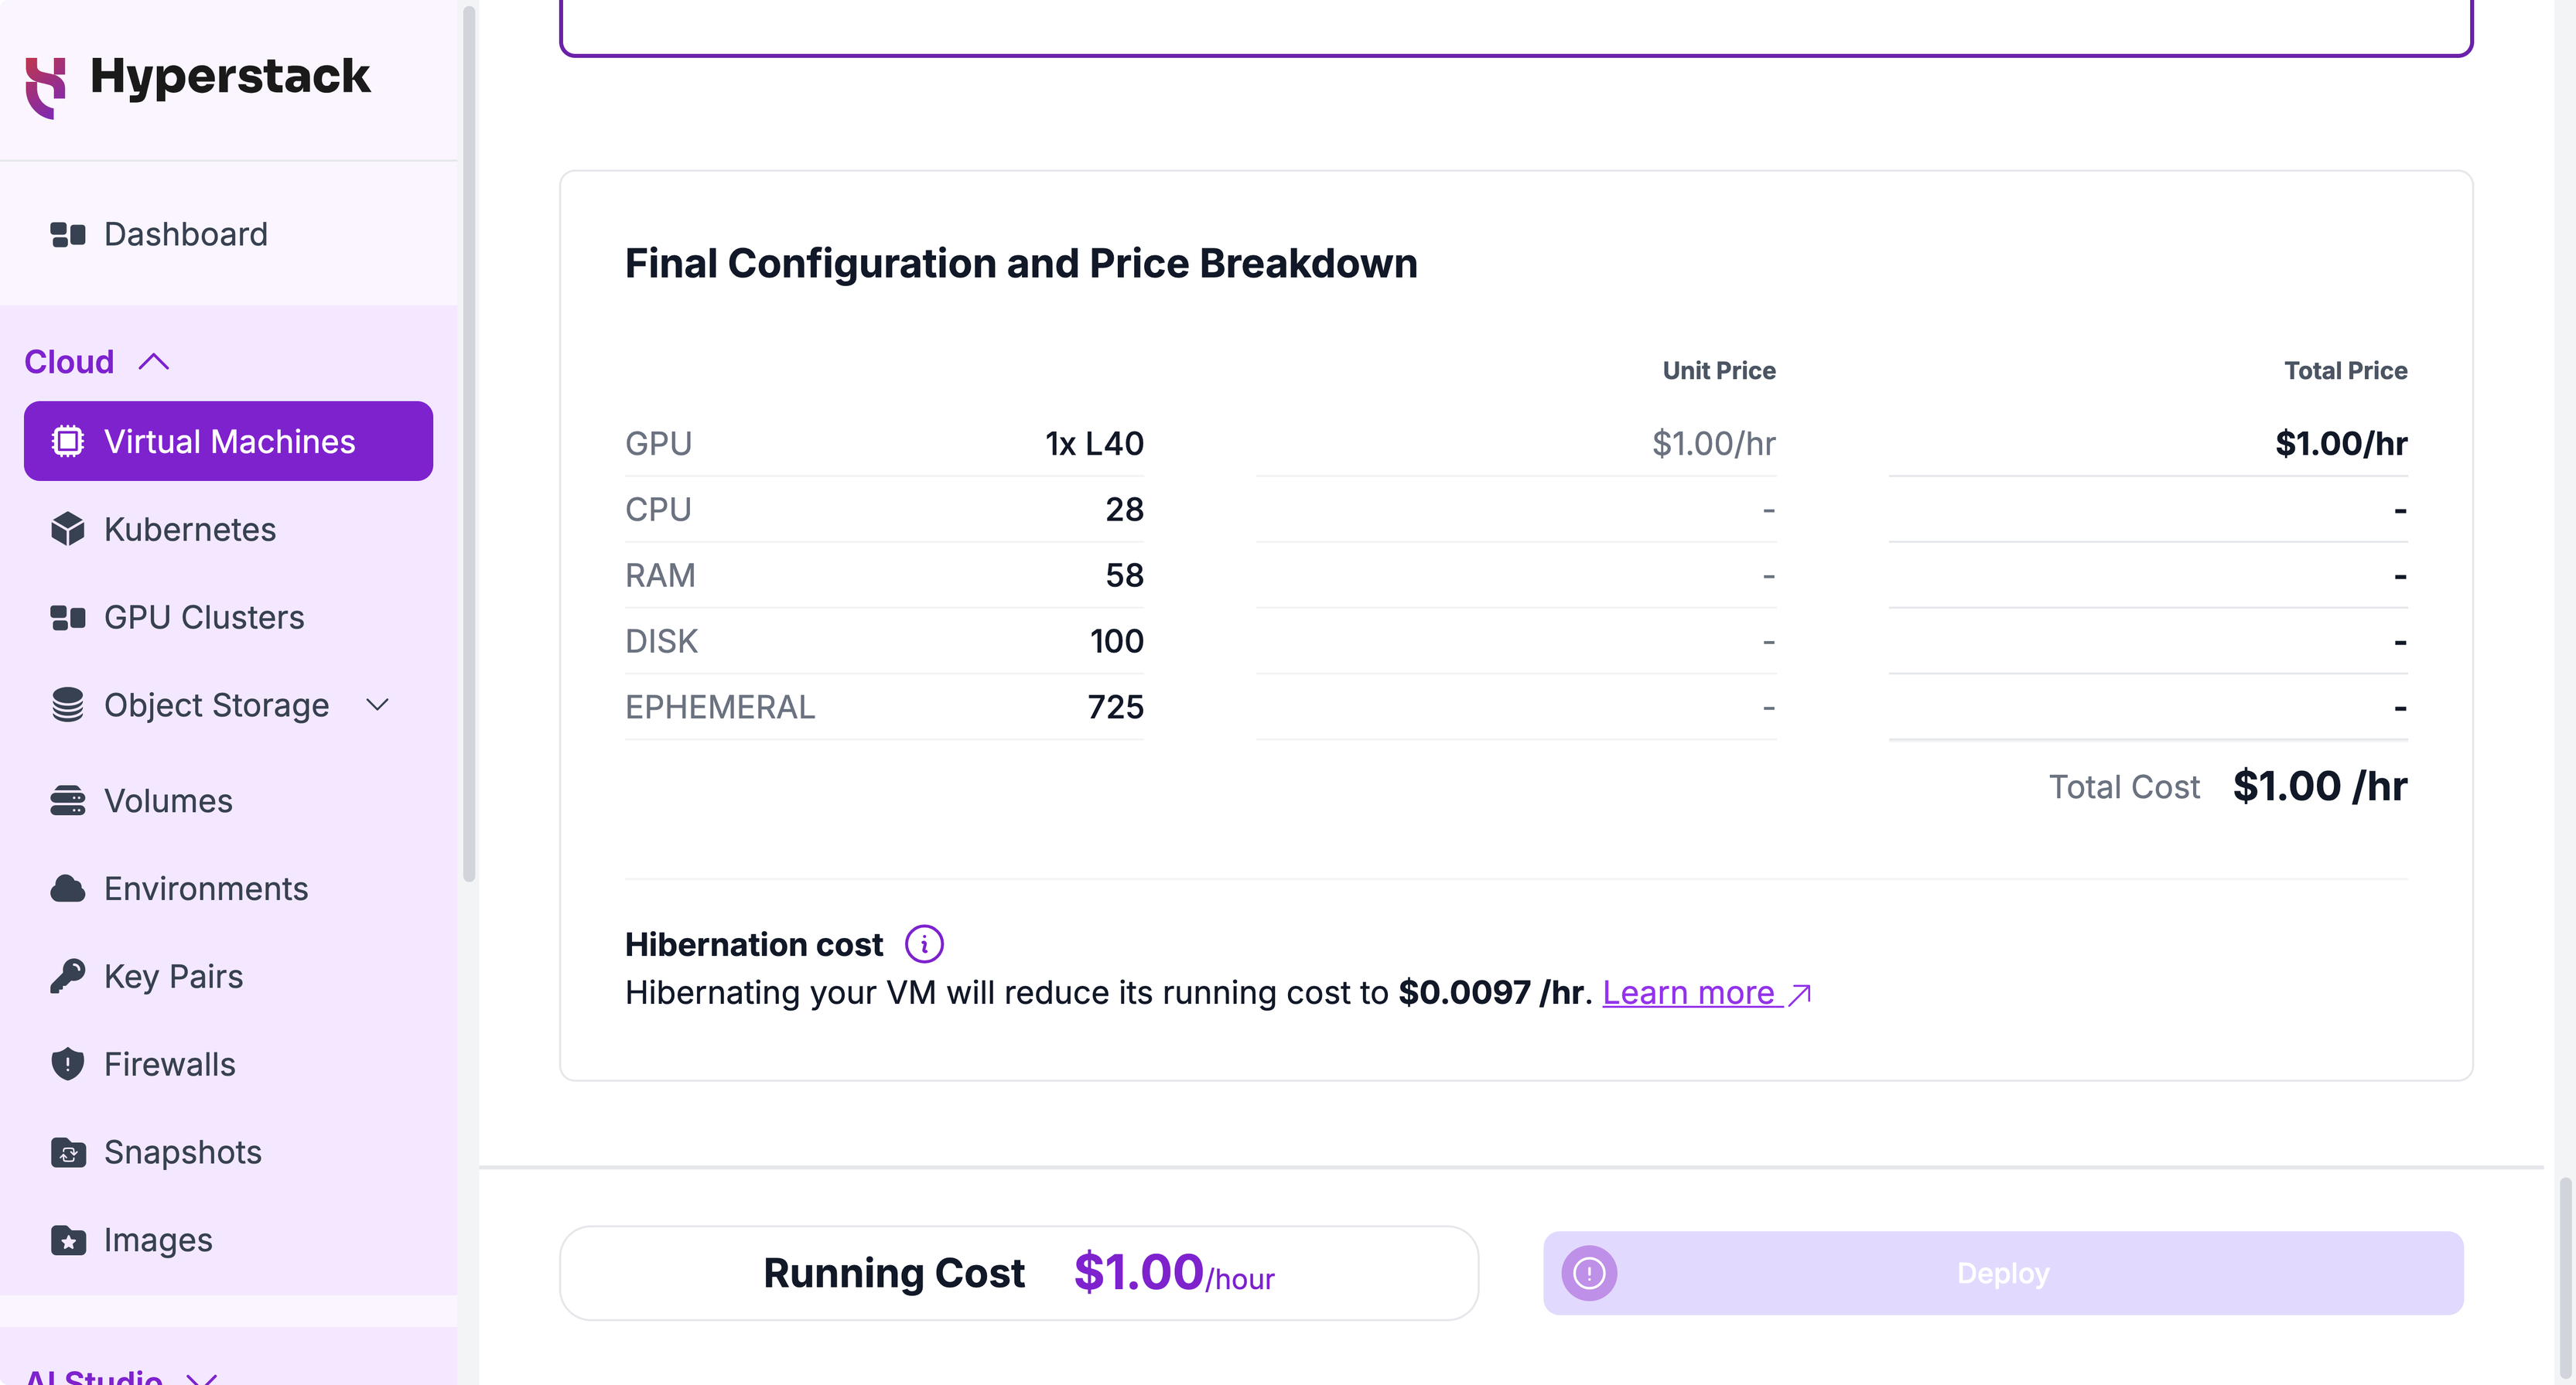
A few rules determine what you pay across the lifecycle:
- A VM bills while it is
ACTIVE, and continues to bill whileSHUTOFF, because stopping reserves all of its resources. To pause billing for the hardware, hibernate the VM instead, which reduces the cost to the saved storage and any retained public IP. - A public IP address adds a small hourly charge while attached.
- Spot flavors bill at a lower hourly rate than the equivalent on-demand flavor.
For which states bill and which do not, see VM States and Billing. For account types and billing intervals, see Billing Policies.